Halloween Tie Dye
Home » Blog » DIYs and Craft Projects » Halloween Tie Dye
-
Daniela Kretchmer
- Updated: Oct 27, 2023
- Clothing, Dyeing, Halloween, Tie Dye
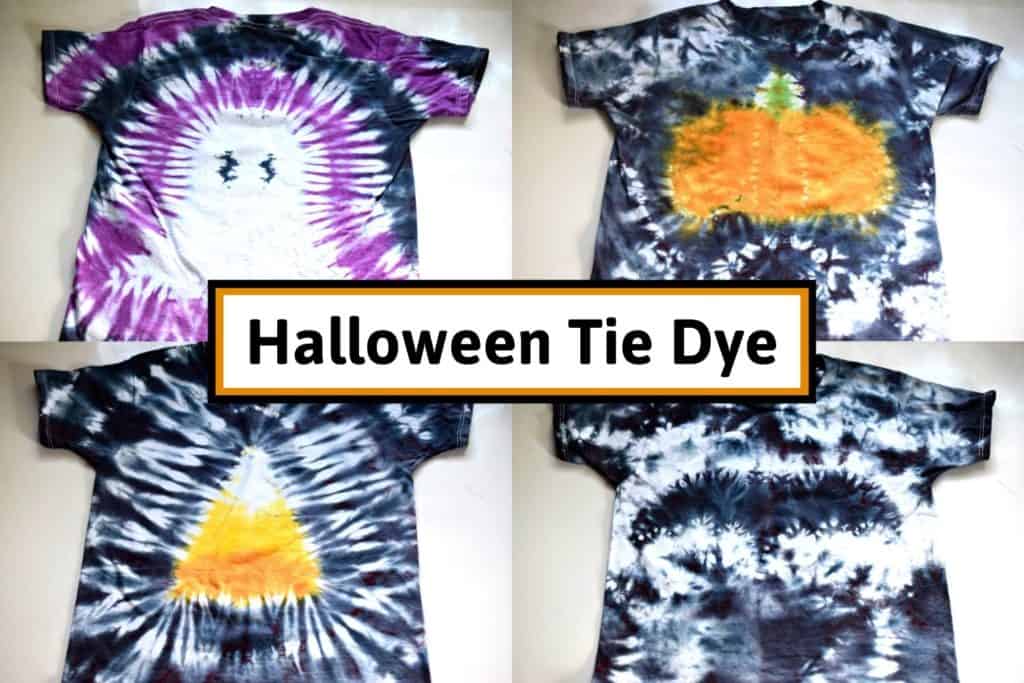
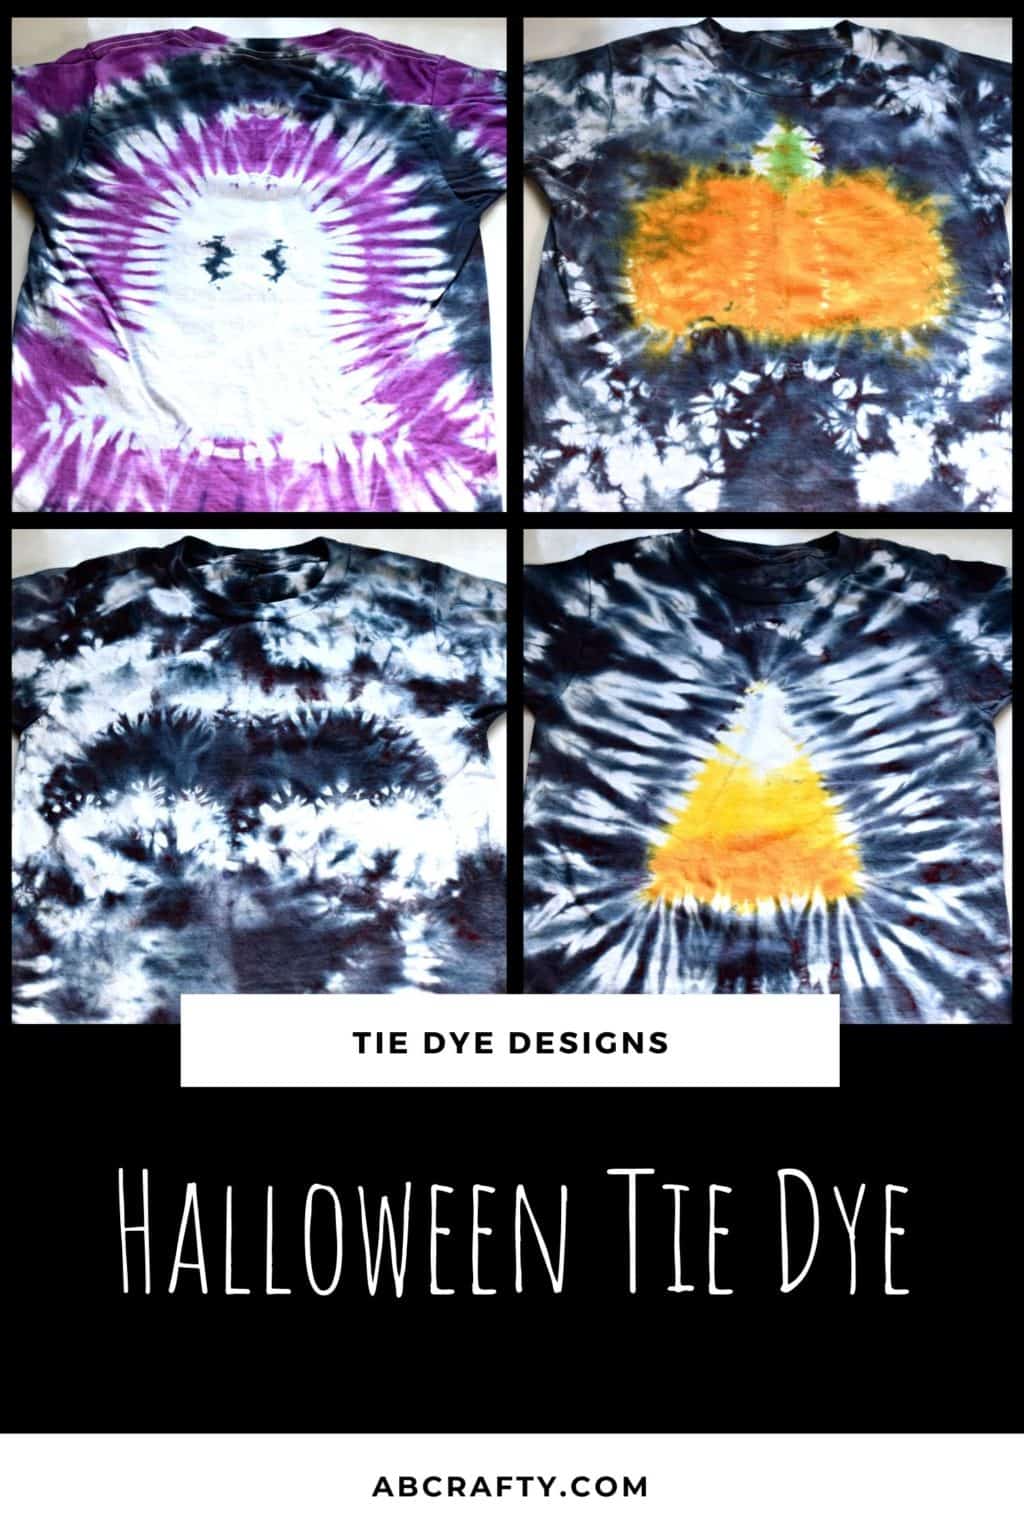
Learn how to make different Halloween tie dye shirts, including a pumpkin, candy corn, ghost, and bat. These patterns are to DYE for!
Table of Contents
These tie dye shirts go beyond the simple tie dye patterns to show you can make actual shapes within tie dye. Once you get the hang of shaping and folding tie dye shapes, you can really tie dye almost anything.
And since it’s Halloween time, why not start with some fun Halloween tie dye patterns? This post just shows the set up and dyeing pattern of each shirt. But each of these dyed Halloween shirts has a full step by step tutorial to go along with it. So if you want to see every detail of each one, click in to learn more:
If you make one of the shirts, I’d absolutely love to see it! Tag me on Instagram @ab.crafty
And here are some fun and easy Halloween pathway lights you can make! Or if you’re looking for a sweet treat, you could try some pumpkin cinnamon rolls.
Note: Some links in this post may contain affiliate links, which means at no cost to you, I may earn a commission.
Don’t forget to pin it so you can come back to it later!
Materials to Make All the Halloween Tie Dye Shirts
All of these shirts use the same materials so if you get a tie dye kit you’ll be able to make all of them!
- White Cotton Shirt (Amazon)
- Tie Dye Kit with Black Dye and Soda Ash (Amazon)
- Washable Marker (Amazon)
- Rubber Bands or Zip Ties (these are the ones I have)
- Plastic Wrap
- Rubber Gloves
- Paper Towels
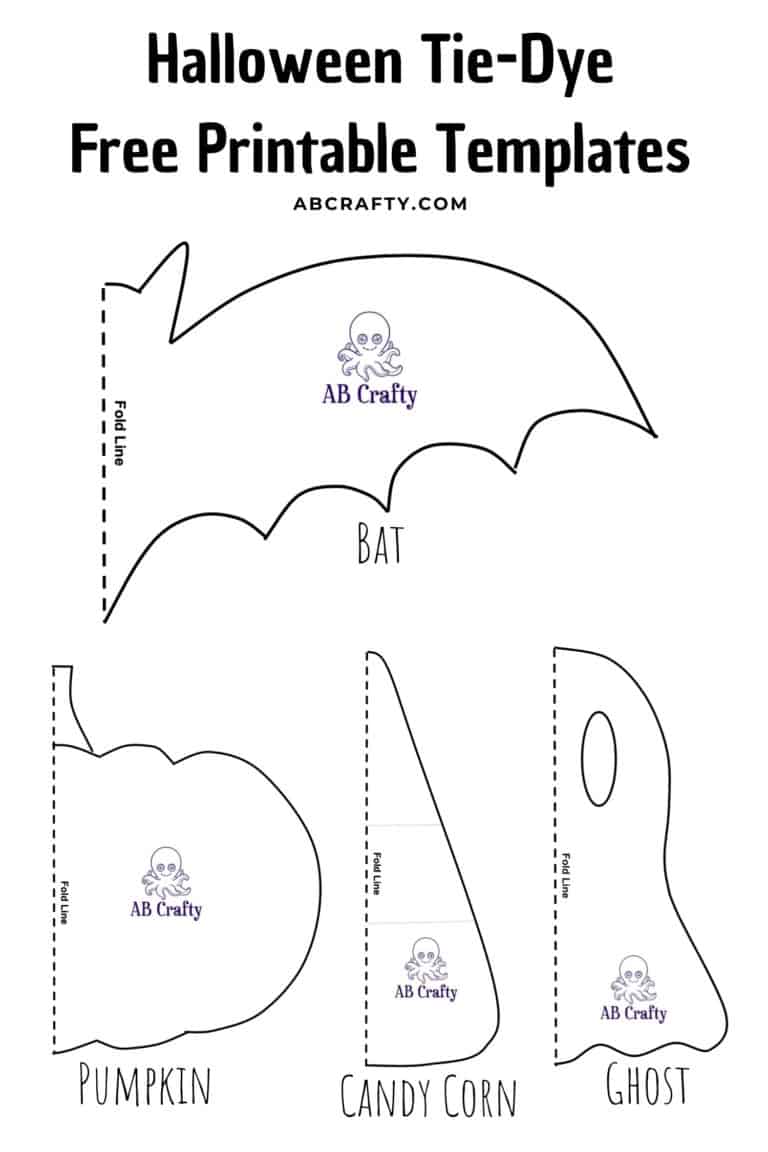
- Halloween Tie Dye Templates
Free Downloadable Halloween Tie Dye Templates
Download these templates to make it easy to make all the Halloween tie dye shirts. Each template is on its own page so you can print the ones you want. Download it below or in the shop.
Scale them to the size you want and print them out to make it super easy to draw the design.
Download the Free
Halloween Tie Dye Templates
We’re committed to your privacy. AB Crafty uses the information you provide to contact you about relevant content and products. You may unsubscribe from these communications at any time.
The Basic Steps to Make the Designs
All of these Halloween tie dye shirt designs use the same technique. The basic steps are:
- Fold the shirt in half.
- Draw half of the design along the fold using the printable template.
- Make small folds along the outline. If the design is simply you can fold it by hand. If it’s more complicated, you’ll sew along the outline and pull carefully on the threads to create the fold. When folding you want to make sure you keep marker line straight. Bend and twist the shirt to make sure the line stays straight.
- Secure the fold with a rubber band or zip tie.
- Fold or scrunch the rest of the shirt with zip ties, keeping the shirt flat.
- Dye the pattern one color at a time using a tie dye kit. Wipe the area in between colors to make sure you don’t get dye where you don’t want it.
- Dye the rest of the shirt.
Halloween Tie Dye Designs
Click on the names or images to jump to the set up for each Halloween shirt pattern. Or scroll through them all!
Pumpkin Tie Dye Shirt
Here are the full instructions to make the pumpkin tie dye shirt.
Fold the shirt in half and draw a pumpkin outline or use the pumpkin tie dye template.
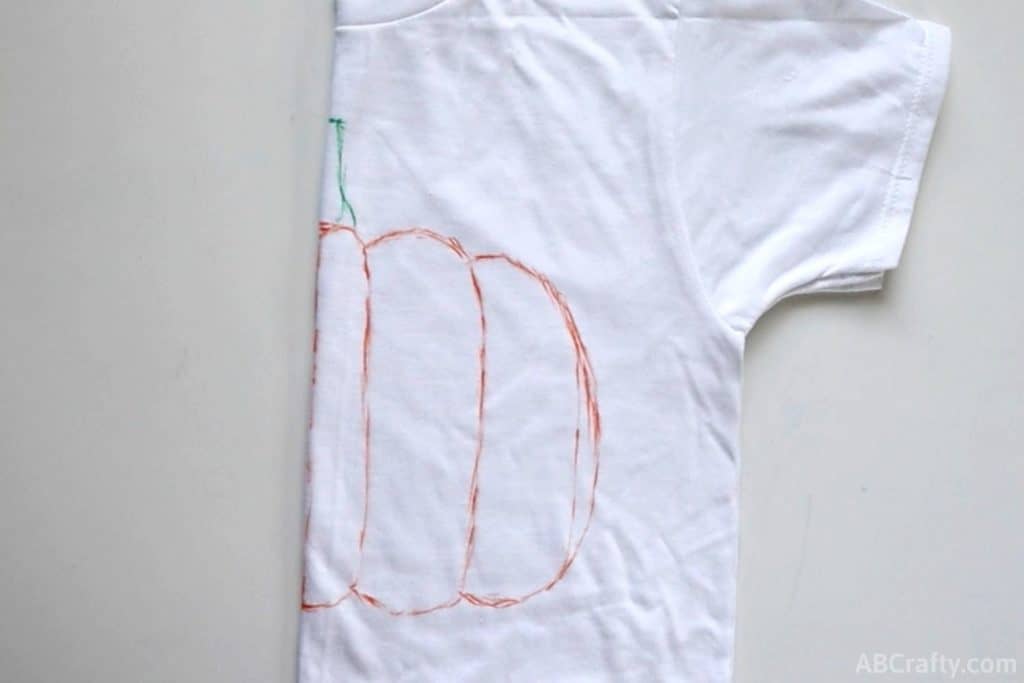
Sew along the outline and pull on the thread to scrunch it up. Do the same for the stem or use a clamp for the stem.
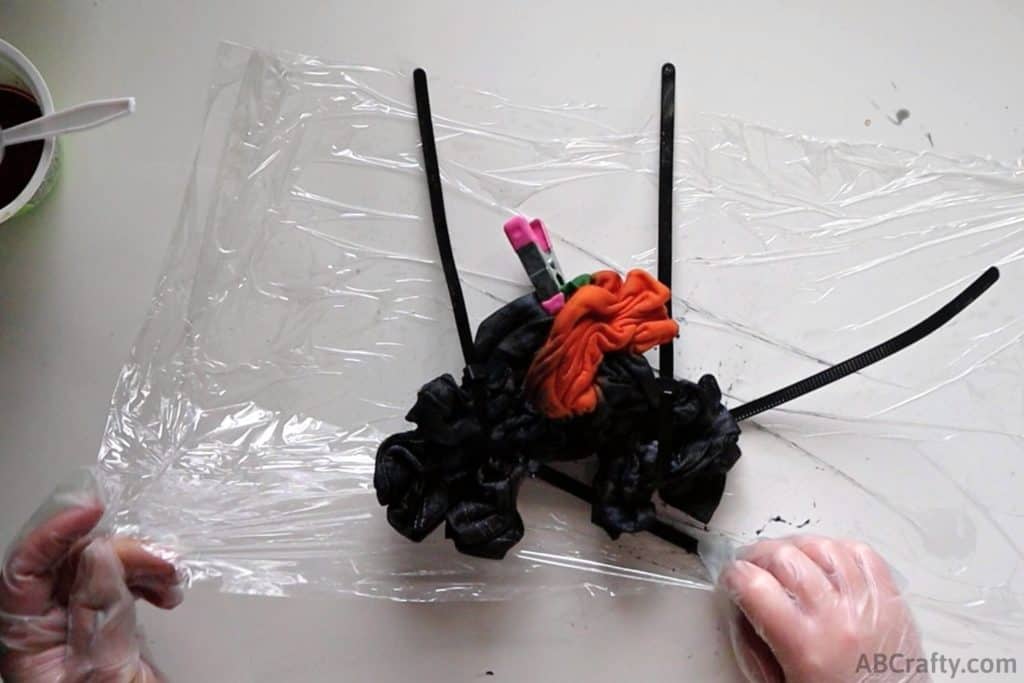
Scrunch the rest of the shirt and secure it in place.
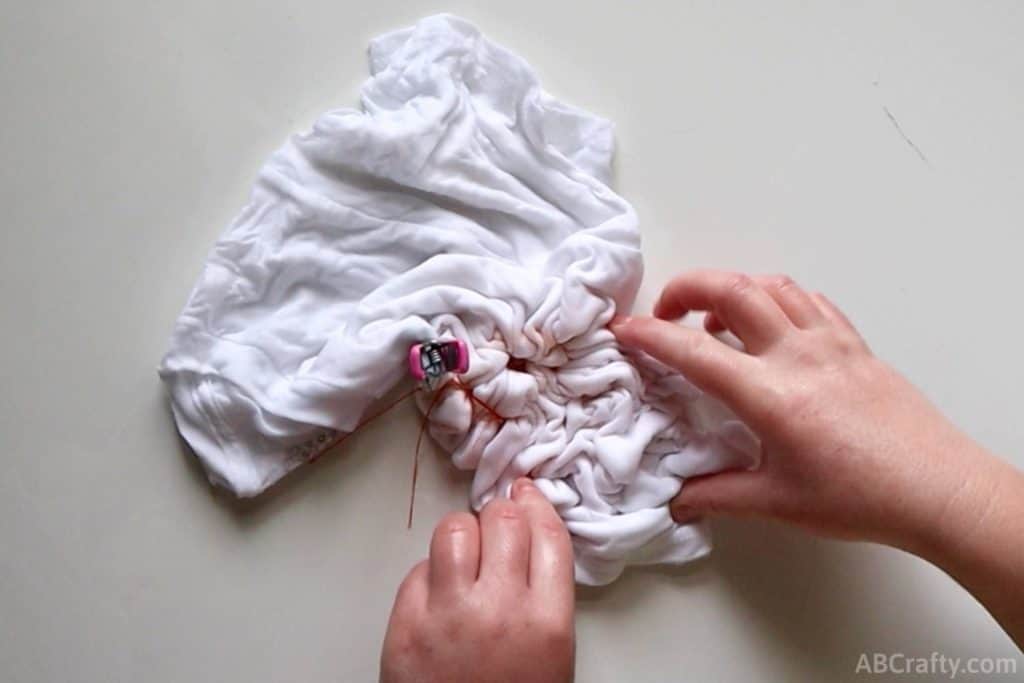
Dye the stem section green (it’s the right of the pink clamp in the photo). Then dye the pumpkin section orange and the rest of the shirt black. Be sure to not let the colors blend together.
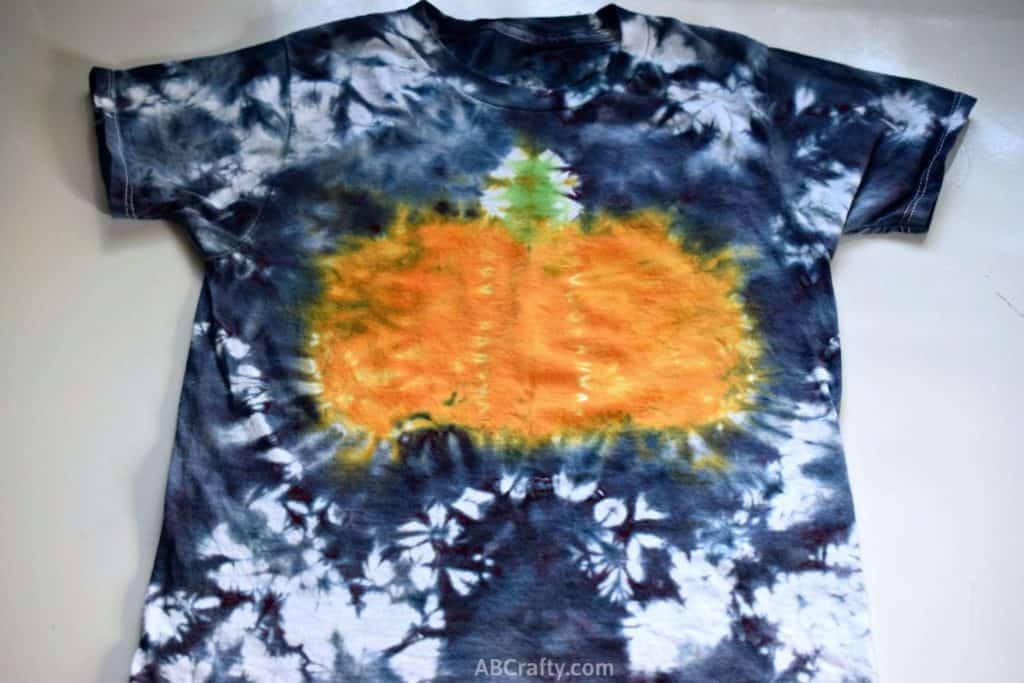
Once rinsed you’ll have a fun pumpkin tie dye design!
Get the latest DIY tutorials, reviews, and crafting updates
You'll never be spammed and can unsubscribe at any time
Ghost Tie Dye Shirt
Here are the full instructions to make the ghost tie dye shirt.
Fold the shirt in half and draw a ghost design or use the ghost tie dye template.
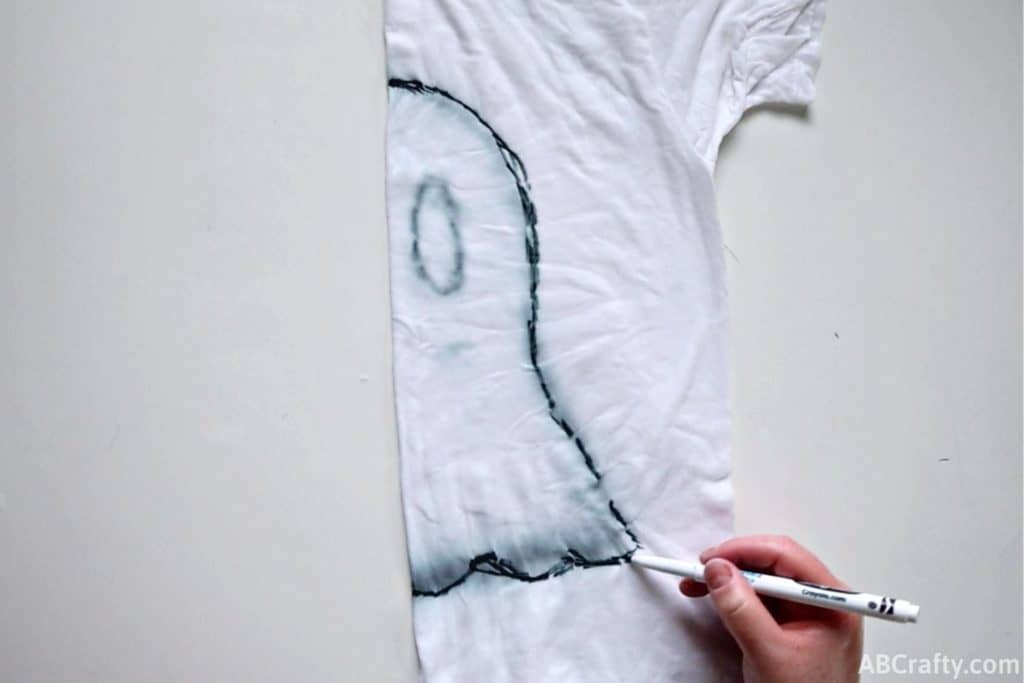
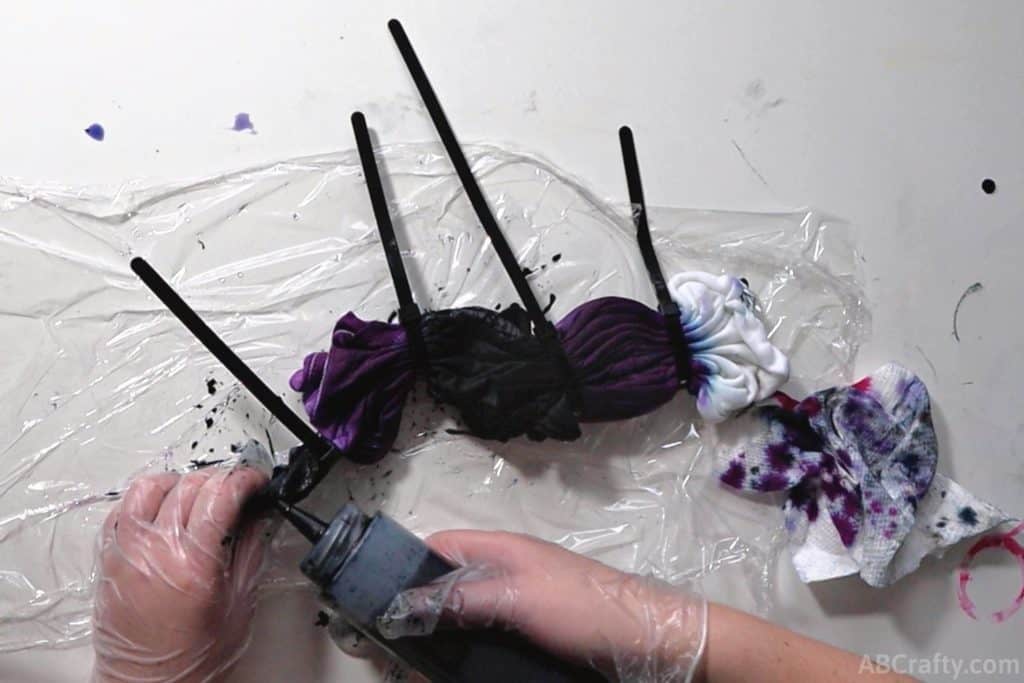
Fold along the lines and tie the shirt. Wrap a rubber band around the eye.
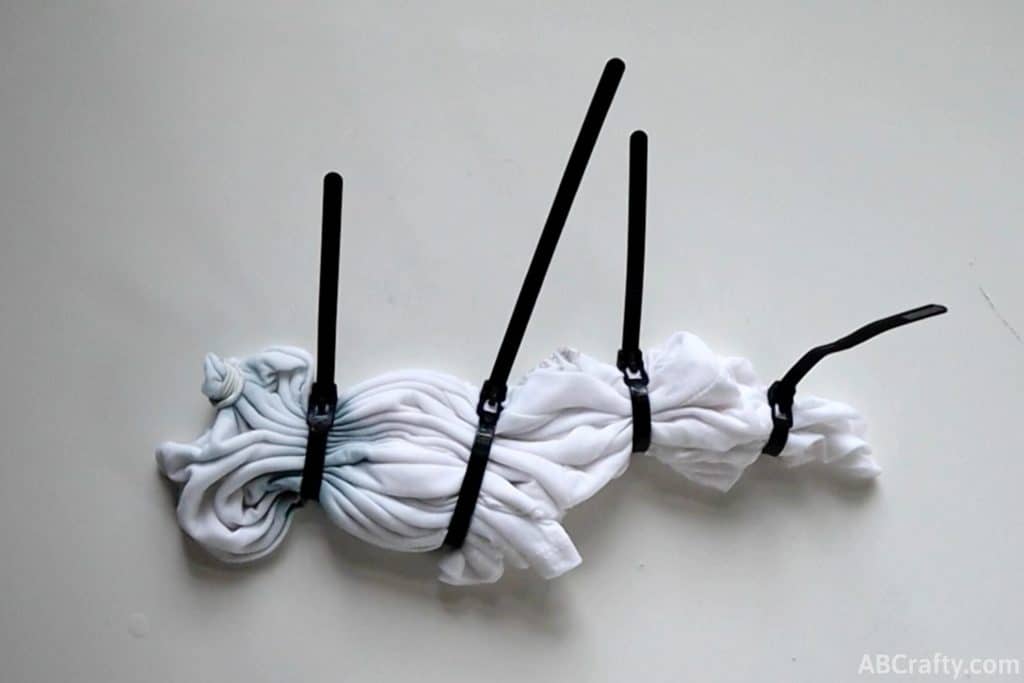
Dye the eye black and leave the next section blank (I flipped the shirt over so the eye is on the right in the photo below).
Then you can either alternate colors for each section like I did or dye it all one color.
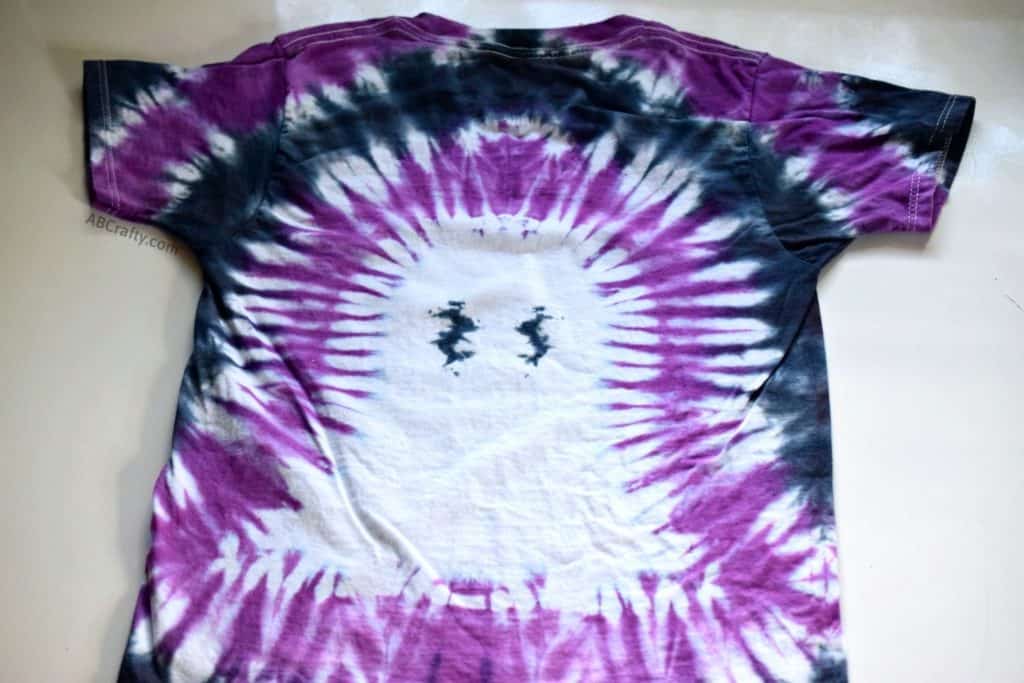
Here’s what the finished ghost tie dye shirt looks like!
Bat Tie Dye Shirt
Here are the full instructions to make the ghost tie dye shirt.
Fold the shirt in half and draw half of a bat design or use the bat tie dye template.
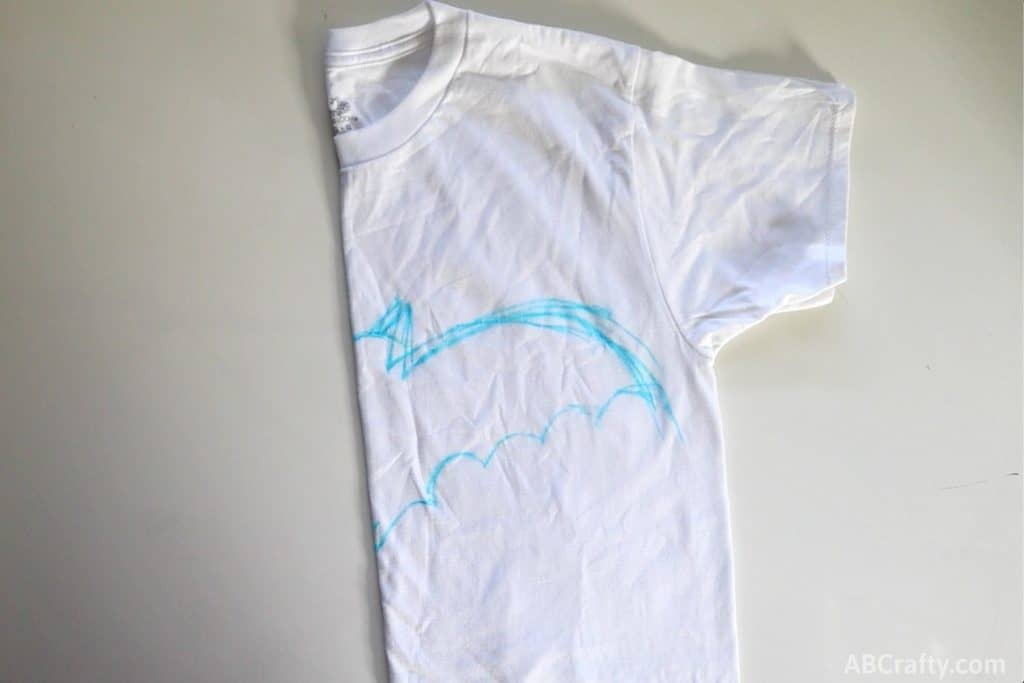
Sew along the outline and pull the threads to make the folds. I recommend pulling from each end so you don’t break the thread. Add a rubber band to each side of the outline.
Then fold or scrunch the rest of the shirt and tie it.
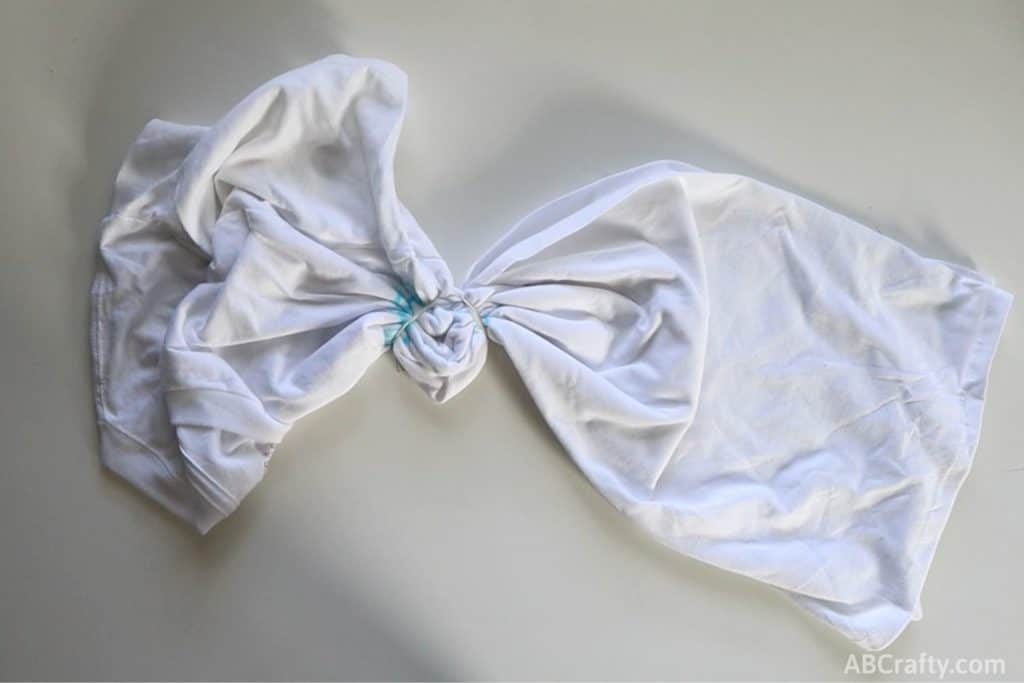
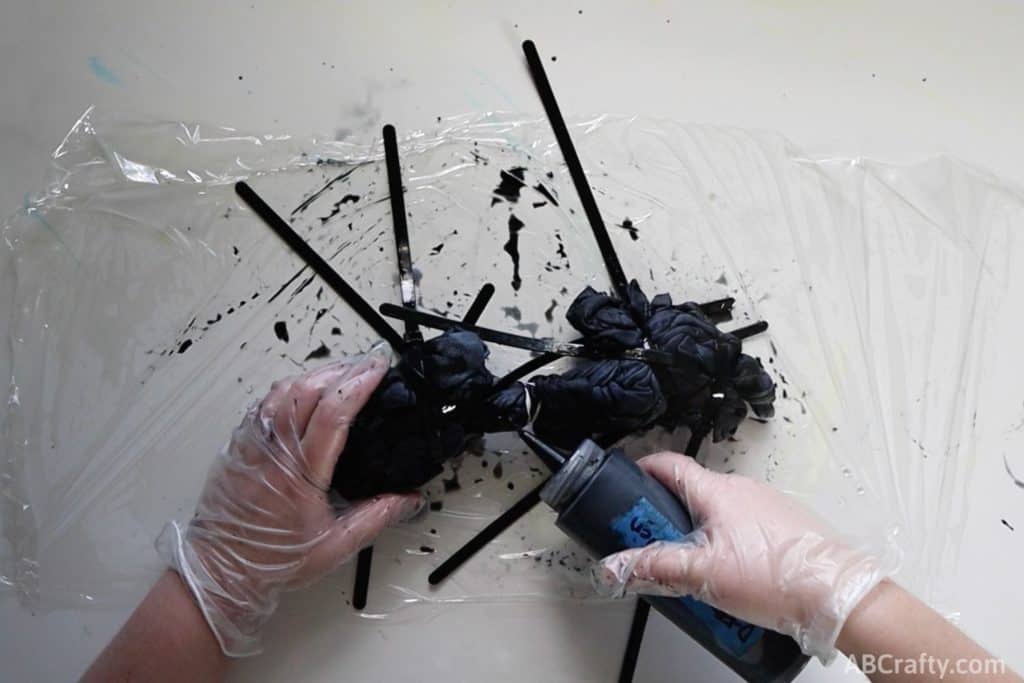
Cover the entire shirt with black dye.
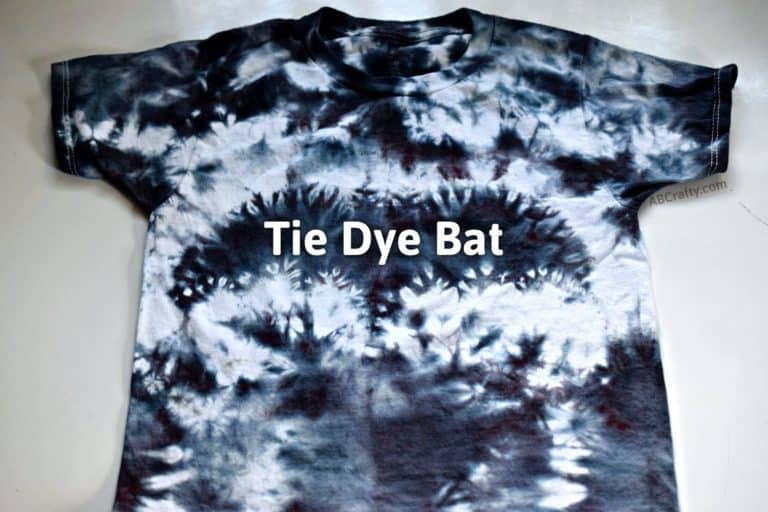
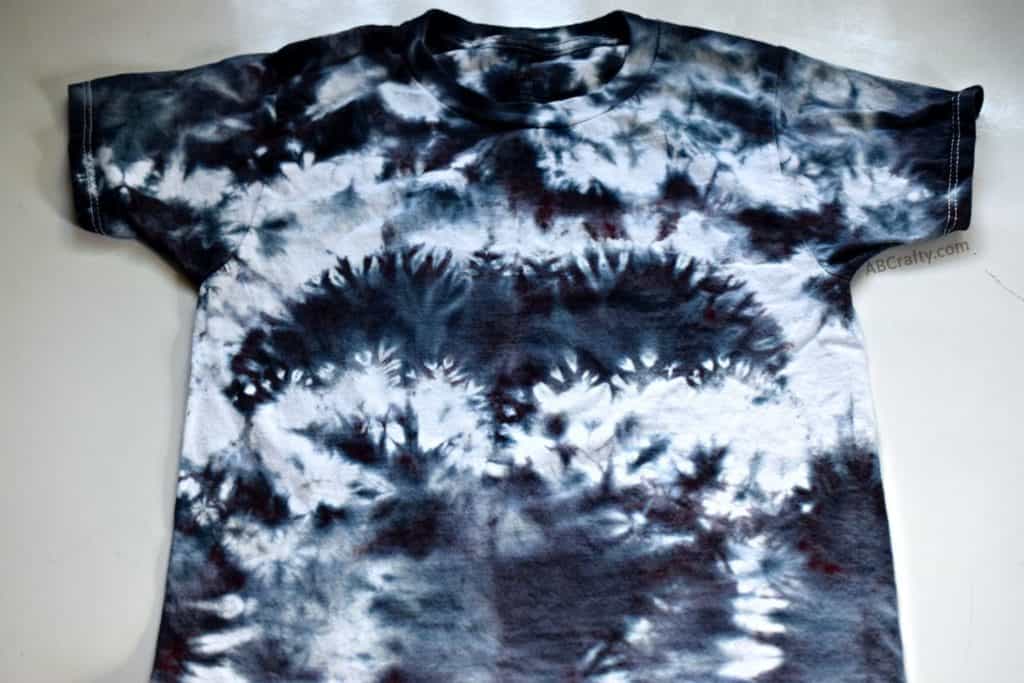
Here’s the finished bat tie dye shirt!
Candy Corn Tie Dye Shirt
Here are the full instructions to make the ghost tie dye shirt.
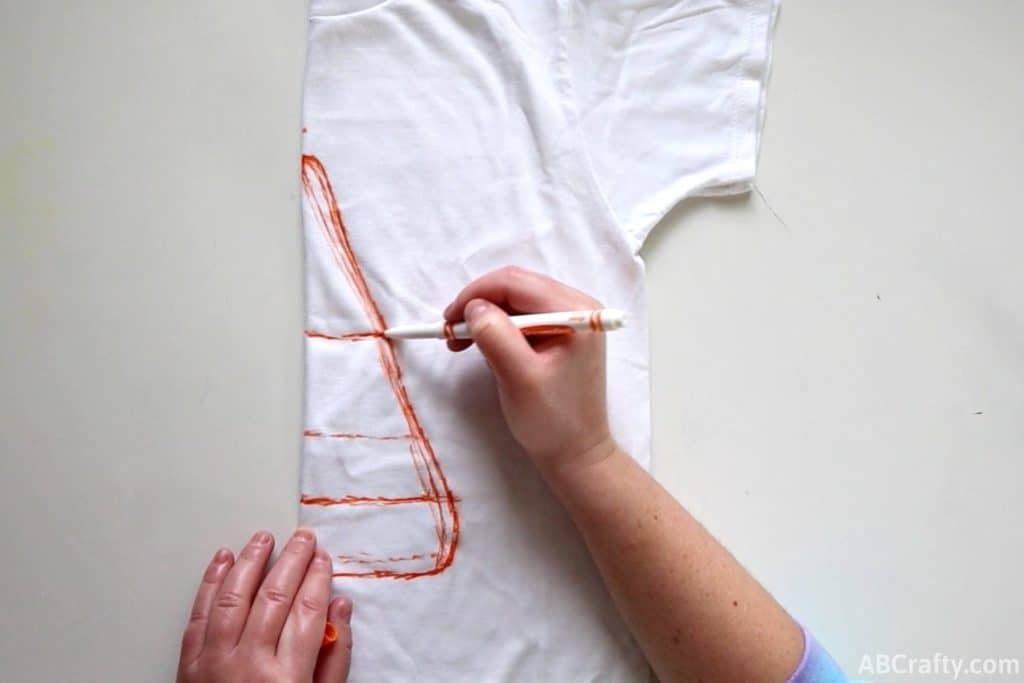
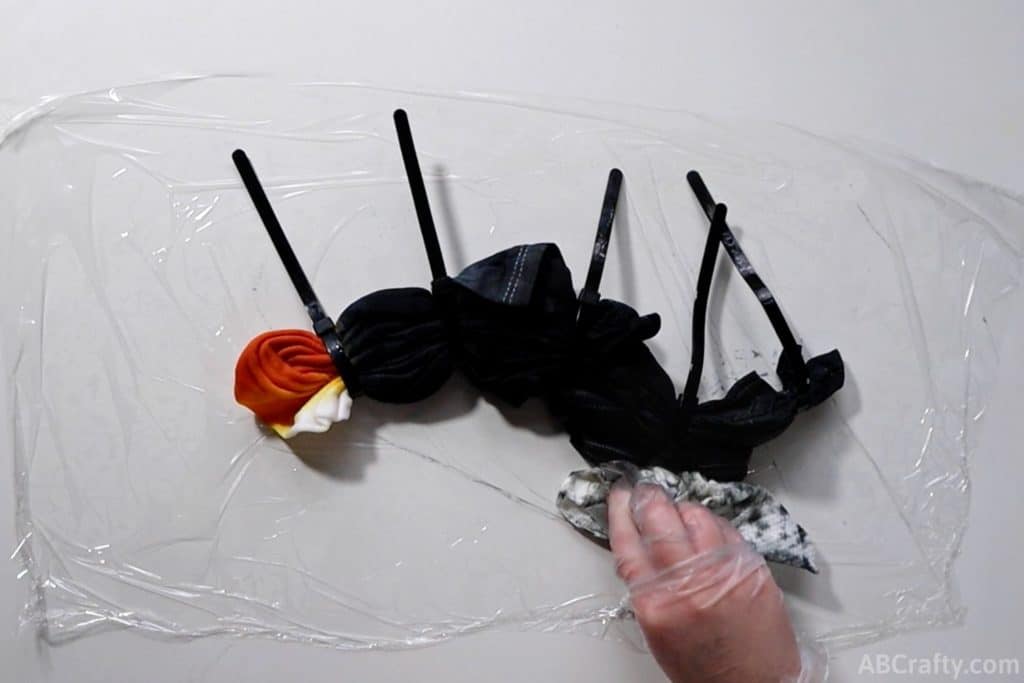
Fold the shirt in half and draw half of a candy corn shape or use the candy corn tie dye template. It’s basically half of a long rounded triangle. Then draw two lines across it to mark where the different colors will go (I kept moving my lines so I have more, but the template has them marked).
Fold along the outline and tie it on the line. Then fold and tie the rest of the shirt.
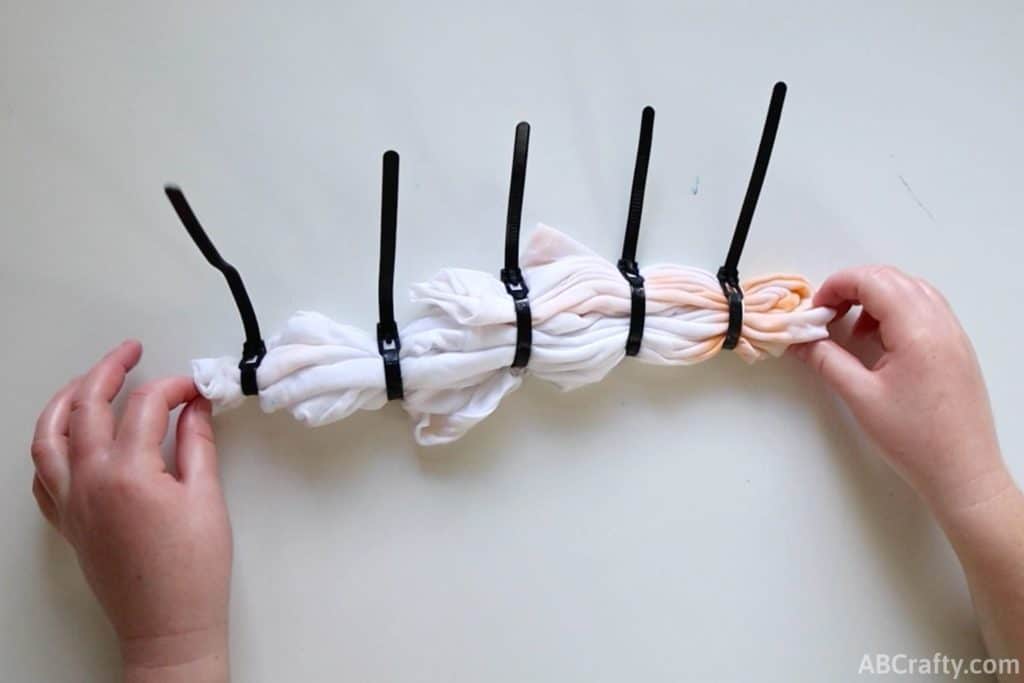
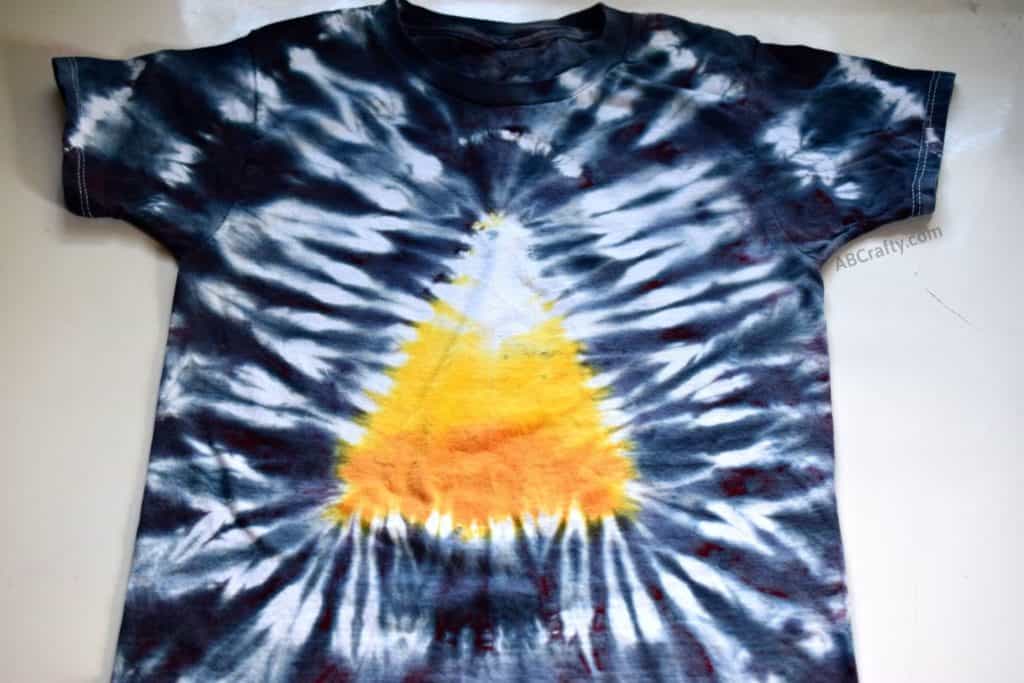
Add orange to the bottom section of the triangle – it will look like it’s at an angle. Look for the line you marked and it’ll make it easier. Then add yellow up to the next line. Leave the space above the top line white.
Then dye the rest of the shirt black.
And here’s the finished candy corn shirt! I have to admit, I think this one’s my favorite. Even though it’s the most simple of the Halloween tie dye designs, it brings a smile to my face every time I see it.
