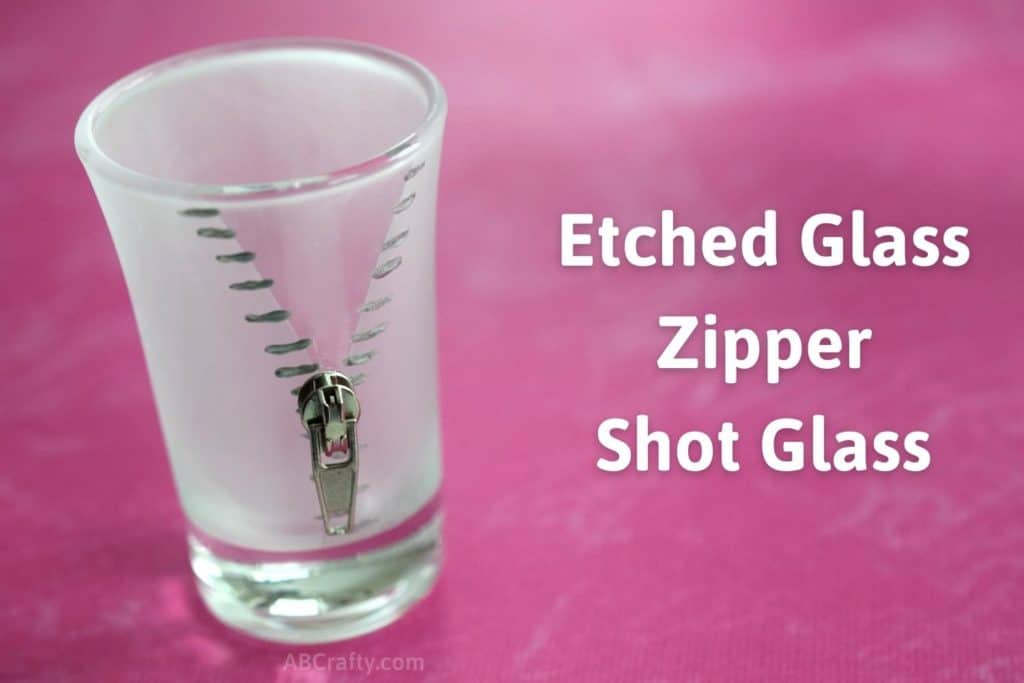
Learn how to make etched glass and create a fun and whimsical zipper design on a shot glass. These shot glasses are what got me into glass etching and now using these as the project, you’ll learn how to frost and etch glass the easy way with glass etching cream.
Table of Contents
I originally had the idea for these when I saw zipper wine glasses in a store. They were something like $50… each. So naturally I again had one of those “I can do it for less” moments and looked up how to frost glass. It turns out there are a few ways to etch glass including using a sand blaster, acid, and the easiest and most affordable way, using glass etching cream. So in this craft project I’m naturally showing the least expensive route using the glass etching paste.
And since I’m not much of a wine drinker, even though the originals were zipper wine glasses, I ended up making mine custom shot glasses instead. I personally love the zipper design using the smaller zipper pull and think it comes out just as fun. They would make for an adorable gift, especially for a 21st birthday.
Note: Some links in this post may contain affiliate links, which means at no cost to you, I may earn a commission.
What is Frosted Glass and Etched Glass?
As I’m sure you’re well aware, glass is normally clear and smooth. However, frosted glass isn’t. It makes the glass no longer see through and typically feels more rough. Typically when referring to frosted glass, it means large sections are frosted. You’ve probably seen it more often in showers or bathroom windows.
Etched glass, on the other hand, uses the concept of frosting glass, but with the intention of making a design. Etched glass typically refers to the designs made, even though they’re technically frosted. Therefore for etched glass, more often than not more of the piece is see through.
So How do You Make Frosted Glass or Etched Glass?
Glass is technically made of sand so when glass etching or frosting, what you’re doing is removing the top layer of sand. This is why frosted and etched glass feel rough in those areas. Therefore the most effective way to frost and etch glass would be using a sandblaster or with pure acid. But you can also use glass etching cream, also known as glass etching paste.
Using a Sandblaster
A sandblaster is great because it can grind down the sand evenly so it’s all uniform. However, using them is very involved and requires a fair amount of equipment and a proper setup. They would be great for larger projects and frosting glass versus smaller projects for which you want a design etched in glass. Some day I’ll get a sand blaster… some day.
Using a Dremel or Engraver
To engrave or etch freehand designs into glass, a dremel or engraver is what you want. It functions just like a pen and you can use the engraver to draw your designs directly onto the glass. I would recommend a dremel or engraver when doing specific details, but not necessarily when using a vinyl glass etching stencil or trying to cover larger areas. The challenge with this freehand approach is you may remove more than intended and you can get streaking from the engraver.
Using Pure Acid
This really isn’t feasible for the at home crafter, but is more often how frosted glass is mass produced. The pieces are dipped in the acid (specifically hydrochloric acid) and the process is complete.
Using Glass Etching Cream or Paste
Technically etching cream has hydrochloric acid, but instead of dipping glass directly into it, you paint it on in the specific areas you want. You can frost glass this way, which is effectively what I’ve done with this zipper shot glass, but it’s also ideal for small designs etched in glass. It’s a great practical and more affordable option. Etching cream is also perfect to use with vinyl glass etching stencils as you can paint the cream right over the stencil.
Typically when you buy a glass etching kit, you’ll receive a small container of etching cream. This is absolutely what I recommend getting if you’re interested in getting into glass etching.
The main brand is Armour Etch cream and is the one I would recommend. In this tutorial I happened to use Martha Stewart Glass Etching cream, but that’s because I happened to get it on sale from Joann’s. But the Armour Etch cream is easier to find and much cheaper.
Combining Etching Glass with Painting on Glass
A cool effect when glass etching is to combine it with painting glass. And for this zipper shot glass project, we’re doing just that. Therefore I wanted to give some quick advice on how to paint on glass.
I definitely recommend using acrylic paint on glass since it is cheaper than something that would be branded as “glass paint” or “paint for glass.” And yes, you can absolutely use acrylic paint on glass. Most of these will be considered multi surface paints and a good rule of thumb is to check to see if it is enamel acrylic paint.
When you use enamel acrylic paints on glass they are completely dishwasher safe, which is of course perfect for this frosted shot glass project. Who wants to hand wash their glassware? Not me!
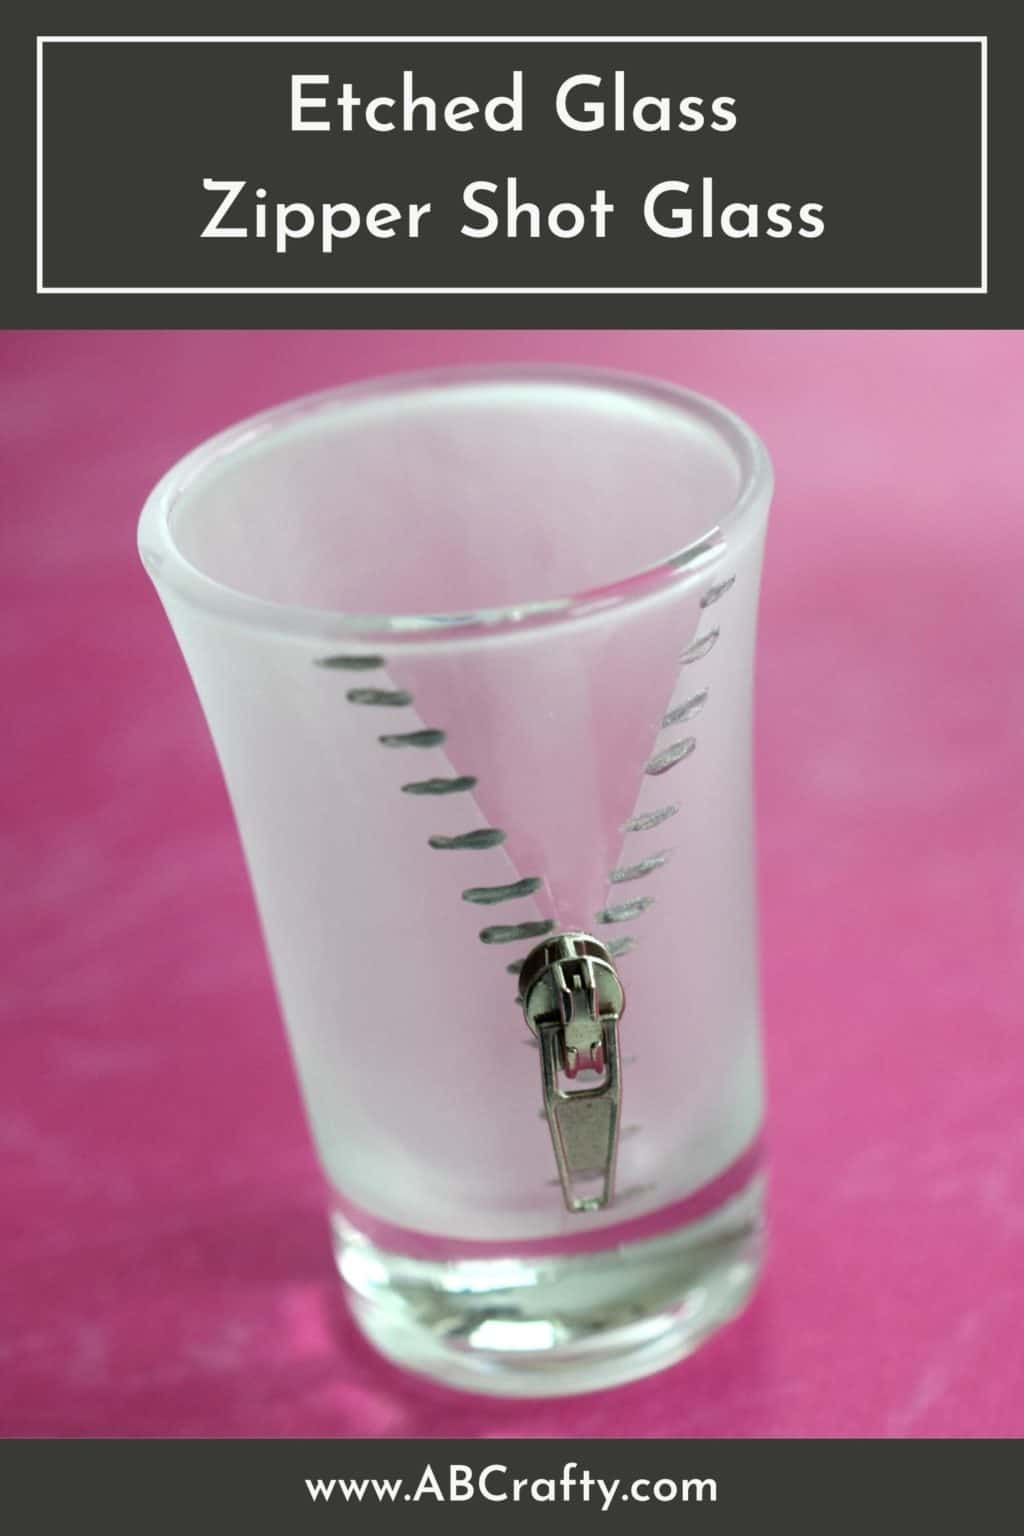
How to Make an Etched Glass Zipper Shot Glass
Materials for Zipper Pull Frosted Shot Glass
- Shot Glass
- Glass Etching Cream
- Paint Brush for Etching Cream
- Vinyl Design Tape
- Painter’s Tape
- Thin Paint Brush for Glass Paint
- Silver Enamel Acrylic Paint
- Zipper Pull
- E6000 Glue
- Gloves
Video Instructions
Step by Step Instructions to Make an Etched Glass Zipper Shot Glass
Before starting, clean off the shot glass to make sure there are no finger prints or other residue. If there is, those spots won’t get etched or it will be blotchy. You will also be taping off sections to create a stencil so you want it clean for the tape to stick.
Start by using the vinyl tape to tape off the bottom of the shot glass. What you’re doing is creating a DIY vinyl stencil since this tape is perfect to create a crisp line. I’ve tried with plain painter’s tape, but the cream seeps through.
Cover the bottom of the shot glass in blue painters tape to prevent it from getting etched.
This isn’t really necessary if you’re good at keeping things clean, but since I tend to make a mess when crafting I don’t like to take any chances. The literal moment etching cream touches glass, the glass is getting etched. It may be faint, but there will still be a mark.
Cut off a small piece of vinyl tape and trim the end at an angle.
Do the same to another piece of tape and place both at an angle at the top of the glass, forming a triangle. I like to give it a slight curve since when a zipper is open it has a slight curve to it.
Make sure the ends connect to a corner, but it doesn’t have to be perfect as the zipper pull will cover it.
Add painters tape between the vinyl tape and wrap it back to the inside of the glass. Again what you’re doing is creating your own DIY glass etching vinyl stencil. Any area not section off will get frosted. Then the area that is taped off will remain clear.
Just in case you touched the part of the shot glass that will get frosted, clean off the glass again.
Shake the container of etching cream and then put on gloves. I repeat, put on gloves. As previously mentioned, etching cream contains hydrochloric acid which is absolutely not something you want touching your skin.
Once you have your gloves on, dip a paintbrush into the cream and paint all around the shot glass. Make sure to give it a good coat so that you can no longer see through it. This will help prevent any splotches.
Let it sit according to the package instructions. If you’re using Armour Etch glass etching cream, that’s 1 minute. And they’re very strict about it so remove the cream after 1 minute using warm water.
Then peel off your “DIY vinyl stencil” (the tape).
Once the tape is off you should have beautifully frosted shot glass. In case there are splotches I recommend using the etching cream again before moving to the next step.
Now it’s time to paint on glass. Dip a thin paint brush into the silver acrylic paint. Then paint little lines on the shot glass along one side of the triangle shape. Make sure some of the painted line is on the glass that hasn’t been frosted.
Stop when you reach the bottom of the unfrosted triangle.
Tip: Pour some of the glass paint into a mixing palette so it’s easier to use.
Flip the shot glass over so it’s easier to work on the opposite side. Then continue to paint lines onto the glass. Again, stop when you hit the bottom of the unfrosted triangle.
Now to paint the rest of the zipper design onto the glass. Continue to paint lines directly below the triangle. However instead of keeping them perfect, paint them on the glass slightly off to one side, alternating the sides. Keep painting the glass until you reach the bottom of the frosted part.
You’ll now see the completed painted zipper design. Let the paint completely dry. As long as you painted small lines, this shouldn’t take very long at all – maybe 10 minutes.
Put a dab of e6000 glue on the back of the zipper pull. Then glue the zipper pull onto the shot glass, right at the bottom of the unfrosted triangle.
Hold it in place for at least 30 seconds. E6000 glue takes 24 hours to completely dry, but after that time your frosted zipper shot glass is completely dishwasher safe.
Get the latest DIY tutorials, reviews, and crafting updates
You'll never be spammed and can unsubscribe at any time
I recommend making a whole set of them as a beautiful and unique handmade gift
More Crafts that Make Great Handmade Gifts
All of these craft projects are great to give to family and friends as handmade gifts.
- For the 21 and up, some Martini Glass Oreo Balls
- Try soap making with these Popsicle Soaps
- For the Harry Potter fans, a Golden Snitch EOS
- And if they’re a Pokemon fan, a Pokeball Bath Bomb
- Or if you’re planning for a bachelorette party, make these venmo QR code bracelets
- Gift a plant clipping with this plant propagation station
Get the latest DIY tutorials, reviews, and crafting updates
You'll never be spammed and can unsubscribe at any time
Etched Glass Zipper Shot Glass
Materials
- 1 Shot Glass
- Glass Etching Cream
- Silver Enamel Acrylic Paint
- 1 Zipper Pull
- E6000 Glue
Equipment
- Paintbrush
- Vinyl Design Tape
- Painter's Tape
- Gloves
Instructions
- Start by using the vinyl tape to tape off the bottom of the shot glass.
- Cover the bottom of the shot glass in blue painters tape to prevent it from getting etched.
- Cut off a small piece of vinyl tape and trim the end at an angle.
- Do the same to another piece of tape and place both at an angle at the top of the glass, forming a triangle.
- Add painters tape between the vinyl tape and wrap it back to the inside of the glass.
- Shake the container of etching cream and then put on gloves. Then dip a paintbrush into the cream and paint all around the shot glass. Make sure to give it a good coat so that you can no longer see through it.
- Let it sit according to the package instructions. If you’re using Armour Etch glass etching cream, that’s 1 minute. And they’re very strict about it so remove the cream after 1 minute using warm water.Then peel off your “DIY vinyl stencil” (the tape).
- Dip a thin paint brush into the silver acrylic paint. Then paint little lines on the shot glass along one side of the triangle shape. Make sure some of the painted line is on the glass that hasn’t been frosted.
- Flip the shot glass over so it’s easier to work on the opposite side. Then continue to paint lines onto the glass. Again, stop when you hit the bottom of the unfrosted triangle.
- Continue to paint lines directly below the triangle. However instead of keeping them perfect, paint them on the glass slightly off to one side, alternating the sides. Keep painting the glass until you reach the bottom of the frosted part.
- Put a dab of e6000 glue on the back of the zipper pull. Then glue the zipper pull onto the shot glass, right at the bottom of the unfrosted triangle.
- Hold it in place for at least 30 seconds. E6000 glue takes 24 hours to completely dry, but after that time your frosted zipper shot glass is completely dishwasher safe.