DIY Pok�ball Bath Bomb: Expert Pok�mon Craft Tutorial

Pokeball bath bomb

Creating an iconic Pokéball bath bomb is the ultimate test of a maker’s skill. While it looks simple, getting a perfectly crisp, horizontal line between the red and white halves without the colors bleeding is notoriously difficult. After perfecting my layering technique, I’ve found that the secret isn’t just the mold, it’s the moisture level. In this guide, I’m sharing my expert ‘dry-pack’ method to help you achieve a professional, spherical finish every time.

Table of Contents

This DIY uses your standard bath bomb recipe so you can customize it to your liking with different scents. I also provide the option to leave it as a plain Pokeball bath bomb or if you want to add in some plastic Pokémon figurines.

Note: Some links in this post may contain affiliate links, which means at no cost to you, I may earn a commission.

diy pokemon bath bomb in the shape of a pokeball with the title "diy bath bomb, pokeball bath bomb"

The "Secret" to the Pokéball Aesthetic

The biggest mistake most crafters make is using too much water. When making a three-tone bomb like a Pokéball, water triggers the citric acid reaction early, causing the red and black dye to ‘weep’ into the white sections.

My Pro Tip: Use 91% Isopropyl Alcohol in a fine-mist spray bottle. It evaporates quickly, locking the colors in place so your center line stays sharp and clean.

Materials for Pokemon Bath Bombs

  • 1 Cup Baking soda
  • ½ Cup Corn Starch
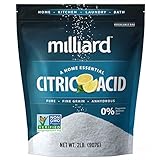
  • ½ Cup Citric Acid (get it on Jacquard for 20% off with code ABCRAFTY)
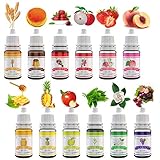
  • Essential Oils – pick your favorite scent (such as these)
  • Body-safe dyes (Amazon)
  • Bath Bomb Mold (If you don’t have an “official” bath bomb mold like this one, you can use one of these household items as molds or a plastic fillable ornament like I did)
  • Rubbing alcohol (putting it in a spray bottle makes the process easier)
  • Latex Gloves (optional)
  • Small Pokemon Figurines (optional) – Make sure they’re small enough

Video Instructions to Make the Pokemon Bath Bomb

Common Pokeball Bath Bomb Problems & Expert Solutions

Problem Likely Cause The Fix
Colors Bleeding / Blurry Line
Mixture is too wet
Mixture is too wet – switch to 91% Isopropyl Alcohol and mist lightly until it feels like “damp sand”
The “Ring” is Uneven
Colors aren’t flat prior to pressing
Use a paper towel to LIGHTLY compress the layer of red prior to adding the layer of black
The halves don’t stick together
Mixture is too dry or they weren’t filled enough
Make sure the mixtures feel like “damp sand” and that you overfill the last layers of each half.

Expert Note: While this tutorial focuses on achieving the perfect professional Pokéball look, you can easily add a surprise inside! Simply embed a 1-inch Pokémon figurine into the center of the white half before joining the two colors.

How to Make the Pokeball Bath Bomb

To begin making your bath bombs, mix all together the baking soda, corn starch, and citric acid, and a few drops of essential oils.

Measuring ingredients

After combining everything, divide the mixture into 3 separate bowls, with one bowl containing a little bit less of the mixture than the other two.

Separating mixture into 3 bowls

In one of the larger bowls, add and mix in the red dye until you’ve reached the color you like. Personally, I find it easier to put on some gloves and mix it by hand. This is because the bath bomb dye can tend to clump together to the mixture so using hands makes it easier to break up those clumps.

Adding red dye

Next, gradually add small amounts of water and mix it in until the consistency feels like wet sand. This is where the spray bottle comes in as it will make it easier to not add too much moisture. You’ll see when you start adding the water that the mixture will begin to fizz – you’ve ultimately started the bath bomb fizzing! Therefore don’t add too much, otherwise you will use up all of your bath bomb fizz.

Red bath bomb mixture moistened to feel like wet sand

Once the red is done, you can move on to the small bowl to which you’ll add black dye and then to the other larger bowl, you’ll just add the water to leave it as white.

Black bath bomb mixture moistened to feel like wet sand
White bath bomb mixture moistened to feel like wet sand

Shaping the Pokeball design

After your mixture is ready, you can start molding your Pokemon bath bombs. To make the Pokeball shape, fill in almost half of each of the plastic ornaments or bath bomb molds.  One should be filled with red and the other should be filled with white.

Since the ornament is see through, I recommend using that versus a bath bomb mold for this project since you’ll be able to clearly see the design.

Pro Tip for Crisp Lines!: Use a paper towel to lightly compress each side so that it’s nice and flat. Look around the sides of the mold to check that it’s flat (this is also why it’s helpful to use a clear ornament for these!)

Red mixture in mold with gap around the top of the mold

After you have an even strip, remove a half-circle of the mixture along the edge of each bath bomb mold. I found first using a spoon to remove the section and then using my finger to smooth out the curve made this step easier. This helps create the distinct lines!

(Keep in mind, I’m using the red half for these examples, but you’ll want to do the same with the white half.)

Using finger to smooth out curve

Once it’s all smooth, layer in a stripe of the black bath bomb mixture to each half of the molds and again, make another curve on top of the first ones. You’ll start see the Pokéball beginning to take shape here as we’re making the black stripe around it

Adding black stripe

After you have your layer of black, fill in the curved out area of each half with the white mixture as this is the button of the Pokeball. As you’re filling both of these colors in, leave it loose and over fill each half as the next step is to push the halves of the mold together.

If you want to have a plastic Pokemon inside, this would be the time to add it as it will be compressed between the two halves.

pressing the bath bomb molds together

Press the bath bomb molds together and wipe away any excess mixture.

Then carefully remove the molds and leave your newly created bath bombs to dry for at least 24 hours.

Finished pokemon bath bomb

Using the Pokemon Bath Bomb

The best part of this Pokemon bath bomb (aside from the fact that it looks like Pokéball!) is the way it turns your bath all sorts of colors! This is like due to the black dye as black dye is made up of all sorts of other colors. Personally, I think it makes the bath look like a galaxy so it also works as a galaxy bath bomb.

And to learn different options for how to use a bath bomb, read my guide on how to use a bath bomb.

Pokemon bath bomb starting to fizz
pokemon bath bomb after being dropped in the bath and having the colors spread

How cool is that galaxy water that it makes? The key to making it galaxy is using the red and black because the black is actually made of a bunch of different colors (in this case that’s what made the purple). And if you like galaxy crafts, be sure to check out the galaxy dream catcher.

More Bath Bomb Recipes and Nerdy Crafts

And if you want more bath bomb recipes, and specifically some great bath bombs for kids, take a look at these:

Finished pokemon bath bomb

Pokemon Bath Bomb

Master the two-tone look with this Pok�ball bath bomb DIY. I'm sharing my expert 'dry-pack' method for crisp red and white lines and a perfect spherical finish�no bleeding or crumbling!
Yield 4 bath bombs
Prep Time 5 minutes
Project Time 30 minutes
Total Time 35 minutes

Materials
  

  • 1 Cup Baking Soda
  • Cup Corn Starch
  • Cup Citric Acid
  • Essential Oil A few drops of your favorite scent
  • Body safe dyes in red and black
  • Water Putting it in a spray bottle makes the process easier
  • Small Pokemon figurines (optional)

Equipment

  • Plastic fillable ornament or bath bomb mold
  • Latex gloves
  • Bowls
  • Spoon

Instructions
 

  • Combine baking soda, citric acid, corn starch, and a few drops of essential oils
    Measuring ingredients
  • Divide the mixture into 3 separate bowls, with one bowl containing a little bit less of the mixture than the other two.
    Separating mixture into 3 bowls
  • In one of the larger bowls, add red dye until you've reached the color you like.
    Adding red dye
  • Gradually add small amounts of water and mix it in until the consistency feels like wet sand.
    Red bath bomb mixture moistened to feel like wet sand
  • In the smaller bowl, mix in the black dye and water until it's the same wet sand consistency.
    Black bath bomb mixture moistened to feel like wet sand
  • In the bigger bowl, only add the water until it's the same wet sand consistency. (This will stay white)
    White bath bomb mixture moistened to feel like wet sand
  • Fill in almost half of each of the plastic ornaments or bath bomb molds - one with red and the other with white. Leave a small and even gap towards the top of the molds.
    Red mixture in mold with gap around the top of the mold
  • Use a spoon and/or your finger to remove a half-circle of the mixture along the edge of each bath bomb mold.
  • Layer in a stripe of the black bath bomb mixture to each half of the molds and again, make another curve on top of the first ones.
    Adding black stripe
  • Fill in the curved out area of each half with the white mixture as this is the button of the Pokeball. (If you want to add in a plastic Pokemon, this would be the time to place it in). Press the bath bomb molds together and wipe away any excess mixture.
    pressing the bath bomb molds together
  • Carefully remove the molds and leave the the bath bombs to dry for 24 hours.
    Pokeball bath bomb

Video

Notes

Tip: To create crisp lines, use a paper towel to lightly compress each side before adding in the black stripe. Look around the mold to make sure it's even.
Keyword Bath, Bath Bombs, DIY, DIY Bath Bomb, How to make a bath bomb, Lush, Pokeball, Pokeball bath bomb, Pokemon, Pokemon bath bomb, Pokemon DIY, Spa
Picture of Daniela Kretchmer

Daniela Kretchmer

Daniela is a lifelong crafter who loves to share her passion for crafting. Through classes or learning on her own, she likes to say she'll do pretty much any craft aside from scrapbooking. Her current personal obsessions include garden crafts, felting, and spinning yarn.

More Craft Projects and Ideas

Leave a Comment

Your email address will not be published. Required fields are marked *

Rating