Rock Tumbling 101: Beginner’s Guide to Polishing Rocks

finished polished rocks including jasper, quartz, amethyst, tiger's eye, obsidian, and blue goldstone with the title "beginner's guide to rock tumbling"

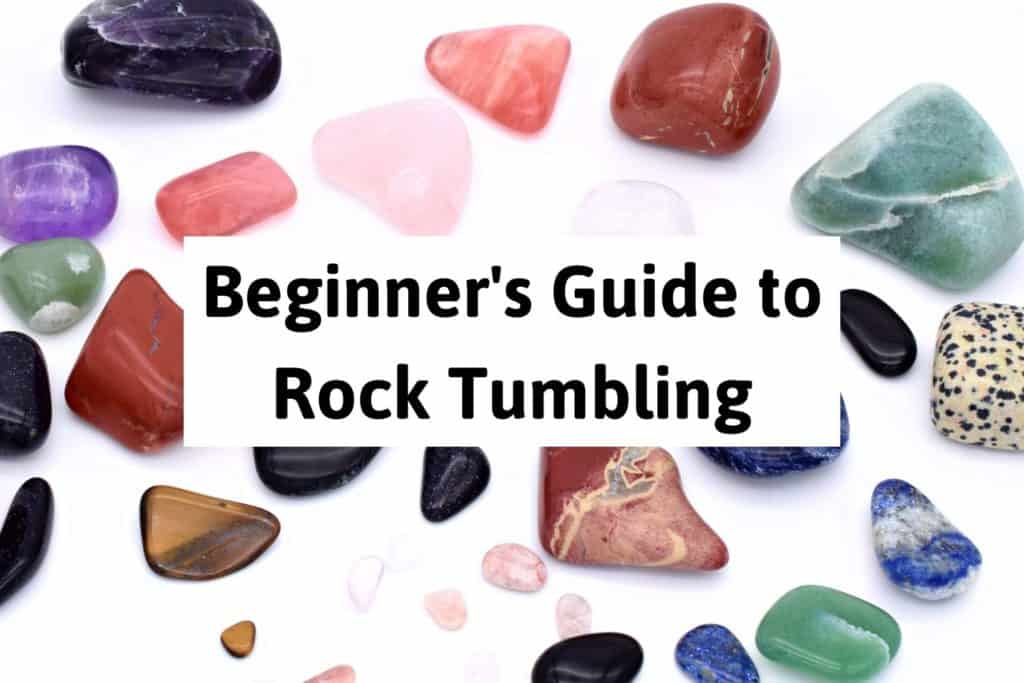
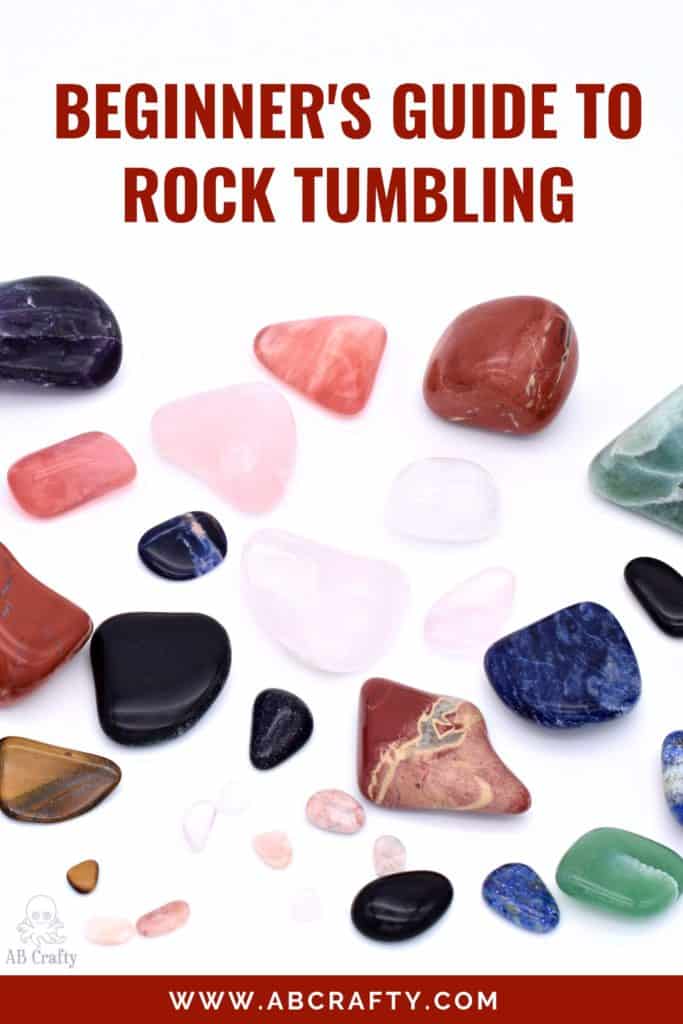
This guide to rock tumbling provides all the information you need to get started, including tips on choosing the right stones, using a rock tumbler, and polishing them to perfection.

Table of Contents

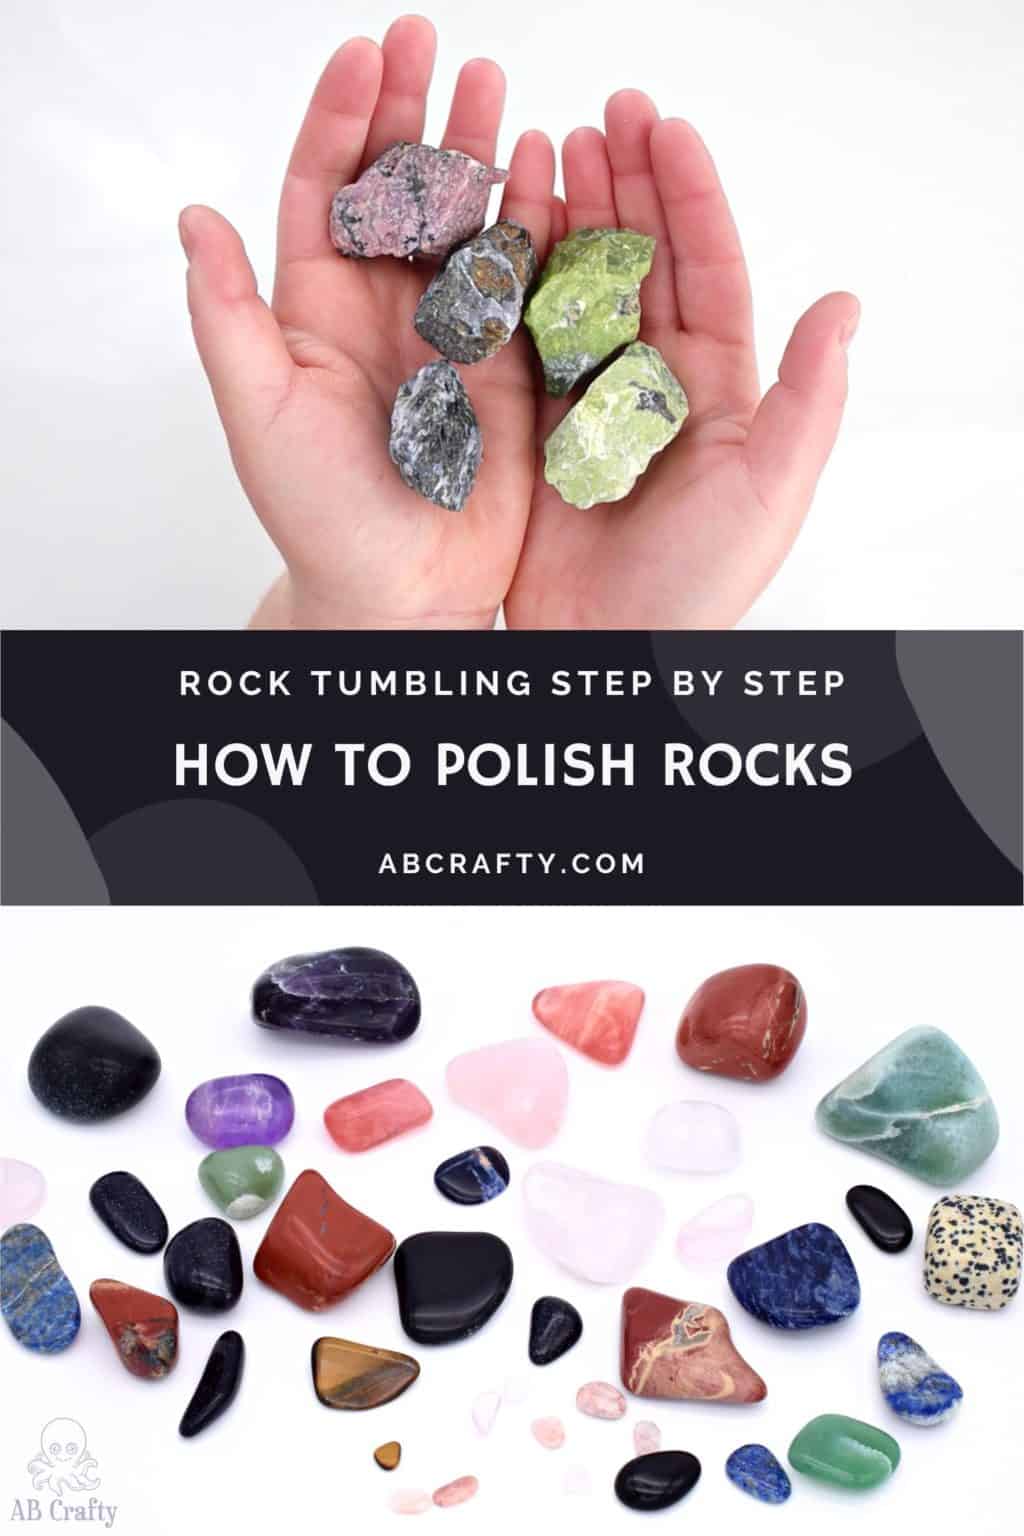
When I received a rock tumbler to test, I had no idea that I would become obsessed with rock tumbling. It’s so much fun to take a “boring” rock and make it shiny and smooth, which is why I’ve included it in my list of the best gifts for crafters. And the polished rocks can be used in other projects, which just makes the whole process even more enjoyable.

If you’re looking for a new project to try, rock tumbling is definitely something you should consider! But be careful though, you might become just as obsessed as I am. I have most definitely spent the last couple weekends searching for rocks to tumble – I’m officially a rockhounder.

This beginner’s guide provides all the information you need to get started tumbling rocks, including tips on choosing the right stones, using a rock tumbler, and polishing them to perfection. If you’re in the market for a polisher, these are my recommendations.

If you want to make some beautiful rocks you can eat, try these candy agate slices. Or grow your own crystals with these borax crystal ornaments.

Get the latest DIY tutorials, reviews, and crafting updates

You'll never be spammed and can unsubscribe at any time

Note: Some links in this post may contain affiliate links, which means at no cost to you, I may earn a commission.

Don’t forget to pin it so you can easily come back to it later!

finished polished rocks including jasper, quartz, amethyst, tiger's eye, obsidian, and blue goldstone with the title "beginner's guide to rock tumbling, abcrafty.com"

What is Rock Tumbling?

Rock tumbling is the process of polishing rocks and minerals in a rock tumbler (such as this). This involves adding stones or minerals to the rock tumbler along with some abrasives, such as grit, fillers, and water. The way it works is rock tumbler rotates, causing the abrasive particles to rub against the rocks, and over time the rocks become smooth, shiny, and round.

The steps I outline here are how to polish rocks using a rotary rock tumbler (the ones with a spinning barrel). You can also polish rocks by hand or with a vibratory tumbler. I have a full guide on how to choose a tumbler for your needs.

top photo is holding raw stones, including serpentine, gabbro, and rhododendrite with the bottom showing the finished polished rocks. the title says "rock tumbling step by step - how to polish rocks, abcrafty.com"

Materials Needed for Rock Tumbling

Rock Polishing Instructions for How to Polish Rocks with a Rock Tumbler

Rock polishing with a rock tumbler happens in 4 phases. The same process is repeated in each phase. The only things that change is the grit used (it gets finer in later phases) and the addition of any fillers to fill empty space caused by the rocks getting smaller.

To start, you’ll want to familiarize yourself with your own rock polishing machine. Since I tested multiple machines, I’ll use all the different ones to illustrate the process (maybe I’m using yours in one of the steps!).

Open the Barrel

The true step one is to open the barrel. You can remove the metal top of the barrel by first unscrewing the top. Then you might need to use a screwdriver to lift it. Some machines, such as the Tumblee Bee barrel (one of my favorites!) come with a washer to make it easy to open.

To help you choose the right machine for your needs, I put together a guide on how to select a rock tumbler and the best ones available!

unscrewing the top of the barrel with a washer underneath
using a screwdriver to open the top of the barrel
using a washer to open the top of the barrel

Lift the inner lid. Some have a tab such as the one from AliKids. Otherwise I find it easiest to squeeze the side of the barrel to let in some air. Then you can lift out the inner lid.

pulling the side of the barrel and lifting the inner lid
pointing to the pull tab on the inner lid of a barrel

Select Your Rocks for Tumbling

If you’re using a kit, you can simply add the rocks to the barrel. They have already been pre-selected to tumble well together.

However, if you’re using your own rocks or buying new ones, you’ll want to make sure of a few things when selecting rocks:

  • They’re between the hardness of 5-7 on the Mohs scale
  • They’re all of similar hardness on the Mohs scale (e.g. you don’t want to tumble a 5 with a 7, otherwise the 5 will get destroyed)
  • They’re different sizes
  • They’re not smaller than 1 cm or larger than 2 inches
  • They’re not porous (as in, having lots of bumps and holes like a sponge)
holding raw rocks from the tumblebee kit

You can collect your own rocks or you can purchase them online or at a local rock store. Here are a few places where I got my rocks in addition to the ones in the kits:

  • Agira Jewels on Amazon: Opal, Tanzanite, Garnet, Labradorite, and Aquamarine
  • Vina’s Healing Crystals on Etsy: Green Opal, Rainbow Moonstone, Apatite, Rhodonite, Yellow Carnelian, Zebradorite, Rubellite
  • Meta Earth on Etsy: Carnelian, Gabbro, Moonstone, Quartz, Amethyst, Onyx, Serpentine, Tiger’s Eye, Sodalite, Green Aventurine, Agates, Rhodonite, Jaspers 
  • Rock & Tumble on Etsy: Indigo Gabbro, Chevron Amethyst, Smoky Quartz, Carnelian

Fill the Rock Tumbling Barrel

You’ll want to weigh the rocks and only fill the barrel to 1/2-2/3 full. You need to leave room for the rocks to tumble.

(The first one is the Vevor tumbler, which makes it super easy to see how full it is)

various raw stones in the vevor jewelry polisher barrel
various raw stones in a barrel getting weighed on a scale

If needed, add ceramic media filler. Some of the kits come with it already, but most do not. I highly recommend using it as not only does it protect your stones from breaking, but also it adds more variety in sizes, allowing for a better polish. It’s ultimately optional in the first polishing step, but it should be used if your stones are of similar size. In steps 2-4 of the polish, you’ll absolutely want to use it.

I like to use a combination of small and large ceramic filler.

pouring ceramic filler from the komestone kit into the barrel with raw stones

Then add the step 1 grit. If using a kit, simply empty the packet into the barrel.

If you’re using separate grit (this is the one I’m using in the second image), measure out 2 Tbs for every pound of rocks of the step 1 grit, which is typically a 60/90 grit.

Caution: You don’t want to inhale the grit so I recommend wearing a face mask each time you’re handling the grit. This one is my favorite as I’ve found it to be the most comfortable.

holding step 1 grit from the tumblebee kit
using a tablespoon to measure polly plastics grit and put it in the vevor barrel

Lastly, add water to the barrel. The water should reach to just below the top of the stones.

pouring water into the komestone barrel with raw stones and ceramic pieces

Then to make sure it doesn’t leak, dry off the inner and outer parts of the barrel, inner lid, and the top with a paper towel.

using a paper towel to wipe the edges of the barrel

Close the barrel by putting the inner lid back in, then the metal top, then the washer (if there is one), and lastly tighten the screw.

Tip: Make sure the top is on evenly by putting equal pressure on both sides of the lid. Then as you tighten the screw you can likely close the lid more.

pushing on the top of the lid of the barrel

Get the latest DIY tutorials, reviews, and crafting updates

You'll never be spammed and can unsubscribe at any time

Start the First Rock Polishing Cycle

Set the time and speed on the tumbling machine. Most will have +/- buttons like the one in the photo, but others have simply buttons in which you select the days like with this one.

You can refer to your kit for which settings to use, but I actually don’t recommend following them. Kits that have variable speeds will say to use the highest setting to start, but this can be hard on the stones and cause them to break. Therefore I recommend using the lowest setting from the beginning. It will take longer, but you’ll have better polished rocks in the end.

Tip: When setting the time, I actually recommend setting it to the highest number of days and then setting your own alerts. This is because if the machine stops and you forget, the grit can solidify. But running it for longer doesn’t do any harm.

Place the barrel on the machine, plug in the machine, and press the start button.

Let it run for 6-7 days (some kits will say shorter, but this is the most important step so again, I recommend ignoring the machine’s instructions).

Tip: Move the machine and barrel into the garage or as far away as you can. Between the motor and the rocks tumbling over each other, there is simply no way around a rock tumbler making noise. The best you can do is to put it on something and put something over it that will dampen the sound.

Tip #2: Watch it for a few minutes to make sure there aren’t any issues and the barrel isn’t leaking. It’s good to also check it in an hour.

Tip #3: Check on the machine each day to make sure it’s still running. I’ve had issues of bands breaking, bearings needing oil, or an error message being displayed.

barrel on the komestone rock tumbling kit and pressing the play button

Check a Few of the Stones

After the 7ish days, open the barrel. You’ll see either a brown or grey sludge. Sometimes it’s liquidy and sometimes it’s foamy. The color varies based on the stones you’re polishing.

Tip: Feel the bottom of the barrel to see if you can feel any of the grit still. If you can, you’ll want to run it for longer so the grit can finish doing its thing!

lifting the lid of a barrel, revealing brown sludge
lifting the lid of a barrel, revealing foamy grey sludge

Next, scoop out a few of the stones with the small strainer (usually comes with the kit) and rinse them off to test them. At this point, the stones should no longer have any sharp edges.

If the sample stones are still sharp, put them back in the barrel, and run them all for a few more days.

NOTE: DO NOT POUR THE GRIT SLUDGE DOWN THE DRAIN! The grit and sludge solidifies so you absolutely do not want it going down the drain. This is a sure fire way to get an expensive plumbing bill. The way I like to do it is to rinse them over a bucket and then I dump the bucket outside.

using a small sifter to rinse stones over a bucket

Inspect and Clean the Tumbled Stones

If the sample stones are smooth and you like how they look, then you’ll want to wash them next. I like to put a mesh bag over the barrel (like this one) and dump the contents over the bucket.

putting a mesh bag over the top of the barrel
tilting the barrel with the mesh sleeve over a bin

Then you can rinse the stones at the same time in the bag. Use mild soap (this is the one I use) to wash the stones.

rinsing the stones in the mesh bag over a bin
washing the stones in a mesh bag a bin with soap

Wash the inside and outside of the barrel as well. I recommend using a damp paper towel to wipe the remaining grit and then a fresh paper towel or sponge (not used for food!) to fully clean it.

washing the barrel and lid with soap

Next, inspect each stone. Remember, this first step is the most important in shaping the stones so if there are any you don’t like, now is the time to decide whether they should move on to the next stage. In these examples, these rocks had cuts and bumps that I didn’t like so I saved them for when I ran the first stage of grit again. Another option is to use a rotary tool to grind those parts down (this is the one I have).

Tip: Do not keep stones that have small holes as the grit can get stuck and then ruin the polish for all of the stones in the barrel.

holding an amethyst that's been through the first step of polishing, showing the holes in it
holding a jasper that's been through the first step of polishing, showing the bumps in it
holding blue goldstone after the first stage of tumbling, showing the crack in the middle of it

In case you’re curious, here’s how 3 sets of stones from 3 different rock tumbling kits looked after the first grit stage. (I’ve linked each image to the kit it came from)

Tip: Even though I’m holding the polished rocks in my hand, you’ll want to keep them wet in case there’s any remaining grit particles. I keep mine in a container filled with water as I inspect each one.

When you have selected your stones, you want to clean them off thoroughly to remove any grit. Most kits only say to wash them after the 2nd or 3rd step, but to ensure perfectly polished rocks every time, I highly recommend washing them after each stage of grit.

To do so, put the rocks and any filler into the barrel and fill it with water until the level reaches just below the top of the stones. Then add a few drops of natural dish soap (this is the one I use).

adding soap to the barrel with stones and ceramic filler

Close the barrel and let it run for 1-2 hours. Then rinse it all out thoroughly.

Tip: After rinsing, run it for another 30min-1hr with just water to remove any remaining soap.

holding the tumble bee barrel over the machine

Get the latest DIY tutorials, reviews, and crafting updates

You'll never be spammed and can unsubscribe at any time

Repeat the Rock Tumbling Process for Step 2 Grit

After the stones are clean and ready to move to the next stage of polishing. The process is the same as step 1, but you’ll now use the step 2 grit. This is typically grit that is around 150-250 grit (so slightly more fine than step 1). This grit ultimately wears down the small scratches made by the step 1 grit. It also does a little bit of grinding as well to remove small bumps and cuts.

If you’re using your own grit, you’ll again use 2 Tbs for each pound of rocks. 

Note: Don’t forget to wear a mask!

holding the step 2 grit from the komestone kit

You may notice that when you put the stones into the barrel that they no longer fill the barrel to 1/2-2/3 full. If that’s the case, you’ll want to add filler to make up the rest of the volume. You can use either plastic pellets or ceramic media filler (this is the one I’m using here). Some kits also come with them (for example the pellets are from this kit).

holding the plastic filler beads from the cayama kit
pouring polly plastics ceramic filler into the barrel with stones

Just as in step 1, add water until the level reaches to just below the top of the rocks. Then wipe down the barrel, close it, and place it back on the machine to run for another 7 days.

pouring water into the barrel with stones and plastic filler beads

By the way, it’s a good idea to add oil to the bearings either after each step or every other. This ensures your machine lasts longer. Some machines such as this one (the Tumble Bee) come with the oil, but otherwise you can easily get some on Amazon (10W30 motor oil).

adding oil to the bearings of the tumble bee rock tumbling machine

Repeat the Rock Tumbling Process for Step 3 Grit

After the 7 days, repeat the process from step 2 by first checking a few stones. They should be more smooth than before, but still cloudy or matte looking. Any bumps or cuts should have been worn down.

Just as before, put the samples back in the barrel and run them all for longer if the samples don’t look good.

If they do look good, thoroughly wash the stones and barrel. Then inspect each one, removing those with imperfections such as holes and cuts. It’s also possible some may have broken and created sharp edges so you’ll want to save these to get added to a future step 1.

Note: The next steps will not grind down any imperfections so only move stones to the next phase if they’re completely ready for polishing.

pouring water over jasper stones in a small sifter to clean the grit off

After washing the barrel (and letting it run with the stones for an hour or so with soap and then water), add the step 3 grit to the barrel and fill the barrel with any additional filler to ensure it’s 1/2-2/3 full. Don’t forget your mask!

The grit at stage 3 (also referred to as pre-polish) will be 500-800 grit. Its purpose is to further remove the scratches made by the grit in the first two stages. Very little grinding is done at this point – the first couple days will get some, but then the grit breaks down, preparing the stones for the final polish.

holding a pouch of step 3 grit
pouring water into a barrel with stones, grit, and plastic pellets

Again, let it run for 7 days.

After the pre-polish phase you should have nice and smooth rocks. You can test them by wetting a small piece of felt and adding some of the stage 4 polish to it. Then take one of the rocks and rub it with the polish around 40-50 times. Take a look at it (I recommend using a jeweler’s loupe like the one I have) and if you see any scratches or dings, they need more time.

Note: DO NOT add new stage 3 grit – this will actually ruin the whole batch and you’ll need to treat it as though you just started stage 3. Remember, stage 3 removes the previous scratches and then starts preparing the stones for polish. Adding new grit will remove that preparation by adding back the small scratches.

holding various stones after the 3rd tumbling step

Repeat the Rock Tumbling Process for Step 4 Polishing Phase

Once they’re ready for the final polish, you’ll want to thoroughly clean them.

You can use a toothbrush or nail brush to really get in there. And then if there are any stubborn bits, you can use a pin to scrape it out. If there’s a particle of grit remaining, the whole batch will likely not polish.

Then definitely at this point run the rocks with soap and water for an hour or two. You’ll be surprised at the dirt that comes out!

Tip: I recommend also getting a hands free loupe to make it super easy to see any remaining grit (this is the one I have).

using a toothbrush to clean the stones
using a pin to remove grit from holes in the stone

Once the rocks are nice and clean, put on your mask and add the step 4 grit (the polish) to the barrel and rocks. Again, if you need to add more filler, go ahead and do so.

holding a pack of grit 4 polish
barrel with stones, ceramic filler, and grit 4 polish

Let it run for 5-7 days (I like to just let it run for 7 days as 7 days for each step is easy to remember).

tumble bee rock tumbler with both barrels running

Clean the Polished Rocks

After the 7 days, check the stones as before. You’ll want to use soap to clean them off as sometimes the polish leaves a film on them that can make you think they haven’t been polished (I’ve 100% done this and ended up wasting time and polish!). If they are nice and shiny, rinse them off and run them for an hour or so with soap (or wash them by hand).

Then marvel at your beautifully polished rocks! If you polish rocks of your own, I’d love to see them! Tag me on Instagram @ab.crafty

Get the latest DIY tutorials, reviews, and crafting updates

You'll never be spammed and can unsubscribe at any time

finished polished rocks including jasper, quartz, amethyst, tiger's eye, obsidian, and blue goldstone

The polish rocks above are from various kits. You’ll see the tiny stones are from kits that didn’t contain any fillers. I included them to show what happens when you don’t use any filler and follow the kit’s instructions. Use the fillers!

The ones below are jaspers and tiger’s eyes. Jaspers are one of the easiest stones to polish in a tumbler and are great beginner stones! As a bonus, they’re also easy to find out in the wild!

finished polished rocks of jasper and tiger's eye

And these are from the Tumble-Bee kit. Personally, this one is my favorite since there is so much variety amongst the agates, petrified wood, and quartz.

finished polished rocks including agates, petrified wood, and quartz from the tumble bee rock tumbler kit

Rock Tumbling Before and After

Seeing rock tumbling before and after photos never gets old! Starting with the before photo, you can see the rough, jagged rocks that have been pulled from their natural habitat (though cleaned).

Each one looks different and unique but before they undergo rock tumbling, they’re neat with their stripes, but not super special to look at. But then in the after photo – wow! You’ve got smooth and shiny polished rocks staring back at you – a complete 180° transformation! It’s absolutely fascinating how you can take something so simple such as a rock you find along a path and turn it into literally a piece of jewelry.

I highly also recommend getting a portable microscope to take a look at them. I have this one from Carson that also attaches to my phone so I can take photos and video.

Before Tumbling

two different kinds of stones from the cayama rock tumbler kit

After Tumbling

finished polished rocks of jasper and tiger's eye

FAQs about Rock Tumbling

What's the best machine for rock tumbling?

Ultimately it’s down to personal preference, but the best rock tumblers are usually ones with two barrels so you can continuously polish rock without having to stop and start repeatedly.

 Additionally, look for rock tumblers with a rubber or polyurethane barrel as this reduces noise and wear and tear on the machine. My personal favorites are the Komestone kit for beginners or the Tumble Bee for a more professional tumbler.

I also recommend reviewing my full guide on the best rock tumblers and how to choose one that’s right for you.

What types of rocks are best for rock tumbling?

The best rocks to tumble are ones that are not too soft and not too hard. Softer rocks will wear down faster and you’ll be left with virtually nothing by the end of the polishing process. Meanwhile harder rocks will take an extremely long time.

The best thing to do is to refer to the Mohs scale and stick to rocks between roughly a 5-7. However, when choosing the rocks to tumble together, be sure they’re roughly the same hardness, otherwise the harder rocks will wear down the softer rocks.

Some great rocks to tumble include agates, jaspers, quartz, petrified wood, feldspar, moonstone, serpentine, gabbro, lapis lazuli, labradorite, aventurine, amazonite, goldstone, obsidian, sodalite, and tiger’s eye.

various stones from one bag of the tumble bee kit

Where can you get rocks to tumble?

If you’d prefer to buy rocks to tumble you can get them at a local shop or there are several places online I recommend. Of course Amazon has plenty of options for some great grab-bags. However, I recommend looking for sellers of more unique stones. For example I got opals, garnet, labradorite, and others from Agira Jewels.

Another great place is Etsy where you can either buy grab bags or select specific stones. This is personally my preference since there’s a whole lot more variety of individual types of stones. These are a few of my favorite places:

Additionally, you can find some on other online retailers such as science and school supply stores:

Keep in mind, a bunch of these sellers and grab bags also have crystals for protection if that’s something you’re specifically seeking.

How do you find rocks in nature to tumble?

Instead of buying rocks, you can also go the rockhounding method! This is when you search for your own rocks. You can look for them on beaches, on hikes, around rivers, lakes, and creeks.

When you’re searching, I recommend taking a pocket knife with you as you’ll use it to test the hardness of the rocks. Steel has a hardness of around 6 so if you try to scratch a rock with the knife and it doesn’t live a mark that you can feel, then it’s at least a 6 and could be good to tumble. You can also get a test kit like this one to get a more exact hardness out in the field.

If you’re looking for particular types of rocks for rock tumbling projects, it’s best to do some research in your area before collecting them. There are some great books on stones across the world and if you’re in the US, each state.

How big should the rocks be for tumbling?

You want to use a variety of sizes when rock tumbling. This allows for a great polish in the end. Therefore you want rocks that are small (such as 1-2 cms), along with bigger ones that are 1-2 inches. In an average tumbler, you typically don’t want any single rock to be larger than 2 inches.

What's the best rock tumbler grit to use when polishing rocks?

You’ll use 4 different types of grit throughout the stone polishing process. Starting with coarse grit, you want to use one made from silicon carbide. It’s usually around 60-90 grit.

  • Step 1 is around 60-90 grit
  • Step 2 is around 180-220 grit
  • Step 3 pre-polish is around 500-800 grit
  • Step 4 polish is 1200 grit – the best one is made of aluminum oxide. I have tried others and it doesn’t get as good of a shine as the aluminum oxide so be sure to get this one.

These are ones I’ve had success with:

Fun Fact! Silicon carbide is a 9.5 on the Mohs scale and the grit is numbered based on passing each size grit through mesh screens. Therefore grit with a rating of 60 means it will pass through a mesh with 60 meshes per inch.

Why do you need to use ceramic filler or plastic pellets when tumbling rocks?

The fillers serve two primary purposes; they create friction between the rocks to create a more even polish. And they fill in the empty space in the barrel to prevent excessive tumbling.

You can get different sizes of pellets – these are the ones I have:

What's the difference between ceramic media and plastic pellets as filler in rock tumbling?

While both are great options to fill the space in the barrel, there are some differences between the options.

The ceramic is better for the environment, but they also wear down so eventually new ones will need to be bought. They are, however, much easier to clean.

Plastic pellets, on the other hand, are much more difficult to clean because they have little cuts in them. But they do not wear down so they’ll last nearly forever. They also provide a bit of a softer cushion than the ceramic filler.

How long do I need to run the rock tumbler for each step?

A good rule of thumb is to run the tumbler for 7 days at each step. Then you can check on it and see if it needs more time. Running it for longer is never really an issue and checking the tumbler the same day and time each week may help you remember! 

How long does it take to tumble rocks?

The rock tumbling process can take anywhere from a few weeks to several months, depending on the type of rocks you’re polishing, the size of your rock tumbler, and how smooth you want your polished rocks to be. Rocks with harder surfaces will take longer to polish, while softer rock may require less time.

The most important step is the first grit so spending extra time (even multiple weeks) will make the rest of the process faster. That being said, if you want a perfectly smooth rock with absolutely no bumps or grooves, you may end up taking a whole month at this first step!

Why is the machine stopping randomly?

There can be a number of reasons why your machine might be stopping randomly, some of which include a badly wired plug, lack of lubrication on the bearings, or oil on the drive belt and/or rollers. Make sure to check all of these areas regularly to ensure that your machine is running smoothly. Daily checks are ideal!

Why are my rocks still rough after the first or second grit phase?

There can be several reasons why your rocks aren’t getting ground as smooth as you’d like in the first two grit phases. The causes could be an overloaded barrel, not enough grit, or the barrel is slipping on the rollers. Additionally, if you have both hard and soft rocks in the same rock tumbler, the hard rocks aren’t getting worn down because there are too many soft rocks that won’t be able to grind them.

Check each of these reasons and consider adding more grit, removing some of the rock from your rock tumbler barrel, or separating out the soft and hard rocks into two separate machines.

Why are my rocks cracking?

If your rocks are cracking during rock tumbling, there could be a few reasons why. It might be due to an underloaded barrel, meaning that the rock tumbler isn’t filled enough so the rocks can’t properly tumble. Additionally, if you’re using rock that isn’t suitable for rock tumbling, it could be causing the rocks to crack. Make sure you have enough rock in your rock tumbler and that you’re only using good quality rocks that will do well in a tumbling machine.

That being said, another option is to simply remove the section that’s breaking (for example, if you see a crack forming). You can use a rotary tool with a diamond blade to cut that part off (this is the one I have).

Why are my rocks not polished after the 4th polishing phase?

If your rocks aren’t polishing after rock tumbling, there are several possible causes. The first could be that they are actually polished, but you simply need to wash the film off of it. If they’re still not shining, then it’s possible it wasn’t run for long enough during the second and third stages. It’s also possible there may have been traces of grit from the first three stages that got included in the polishing stage. Additionally, you may simply not have used enough polish during the 4th polishing step. Lastly, it could also be because rocks of different hardnesses were used, causing the softer rocks to get scratched by the harder rocks.

Therefore make sure to use rocks of similar hardness, use enough polish, and make sure to always wash off the barrel and rocks between each stage to remove any grit. And be sure to wash off any film left after polishing!

Why are my rocks all flat and not round?

If your stones aren’t coming out the round rock shapes you desire, it could be because of a few reasons. One could be that the tumbler is underloaded, meaning there aren’t enough rocks in it for the rocks to properly tumble. Another possibility is that the rock tumbler’s speed is too slow. Try increasing the speed and make sure it is filled enough between 1/2 and 2/3, using filler as necessary.

Why is the barrel leaking?

If the barrel is leaking, it’s important to check each part of the lid. Make sure the top is all the way on and the screw is tight. If it is it could be an issue with the inner lid and there could be small particles of rock or grit still in the cap or on the inner or outer rim of the barrel. Make sure to remove all rock and grit particles from the top and barrel and dry it off before closing it.

More Beginner's Guides and Rock Crafts to Try

Get the latest DIY tutorials, reviews, and crafting updates

You'll never be spammed and can unsubscribe at any time

top photo is holding raw stones, including serpentine, gabbro, and rhododendrite with the bottom showing the finished polished rocks. the title says "rock tumbling step by step - how to polish rocks, abcrafty.com"

Rock Polishing 101 - How to Polish Rocks with a Rock Tumbler

Rock tumbling is a great way to turn ordinary stones and minerals into beautiful, polished rocks. Learn step by step how to use a rock tumbler to get perfectly polished stones every time.
Yield 10 Polished Rocks
5 from 3 votes
Project Time 30 days
Total Time 30 days

Materials
  

  • 1-2 lbs Rocks typically included in a kit
  • Rock Tumbling Grit typically included in a kit
  • Ceramic Media Filler or Plastic Pellets sometimes included in a kit
  • Dish Soap
  • Paper Towels

Equipment

  • 1 Rock Tumbler
  • Mesh Bag
  • Small Strainer
  • Bucket
  • Face Mask
  • Old Toothbrush and/or Pin optional

Instructions
 

Stage 1 - Coarse Grit

  • Add rocks to the barrel, filling it to 1/2-2/3 full. Put on a face mask for protection (this is mine) and add the step 1 grit and water, filling it to just below the level of the stones. Use 2 Tbs of grit for each pound of rocks. Most kits like this one come with stones and grit pre-measured.
    Rock Tumbling Grit, 1-2 lbs Rocks
    pouring water into the komestone barrel with raw stones and ceramic pieces
  • Close the barrel and let it run for 7 days.
    barrel on the komestone rock tumbling kit and pressing the play button
  • Check a few of the stones using the small strainer. They shouldn't have any sharp edges. You can choose to run them for longer if they still have bumps and cuts. During this step 1 is when they take their shape.
    using a small sifter to rinse stones over a bucket
  • If you're happy with them, wash the rocks and barrel thoroughly. I recommend placing them back into the barrel with water and a few drops of mild soap and running it for 1-2 hours (this is the kind I use). Then rinse it out.
    Dish Soap
    washing the stones in a mesh bag a bin with soap

Stage 2 - Medium Grit

  • Put on a face mask and add step 2 grit and water to barrel, filling it to just below the level of the stones. If there is room in the barrel, add ceramic media (like this one) or plastic pellets to fill it back to 1/2-2/3 full. Wipe the inside and outside edge of the barrel with a paper towel to dry it, then close it.
    Rock Tumbling Grit, Ceramic Media Filler or Plastic Pellets, Paper Towels
    pouring polly plastics ceramic filler into the barrel with stones
  • Run it again for 7 days. Then check the stones again and repeat the process of either running for longer or cleaning.
    pouring water over jasper stones in a small sifter to clean the grit off

Stage 3 - Pre Polish

  • When they're ready, put on a face mask and add step 3 pre-polish, any fillers, and water and run it for another 7 days.
    Rock Tumbling Grit, Ceramic Media Filler or Plastic Pellets
    pouring water into a barrel with stones, grit, and plastic pellets
  • Again, check the stones and run for longer if necessary or clean them thoroughly. Take extra care to clean the rocks with an old toothbrush if necessary. You can also use a pin to remove any grit particles.
    Dish Soap
    using a toothbrush to clean the stones

Stage 4 - Final Rock Polish

  • After they're fully cleaned, put them back into the barrel, put on a face mask, and add the step 4 polish and any necessary filler. Run for another 7 days.
    Rock Tumbling Grit
    barrel with stones, ceramic filler, and grit 4 polish
  • Check a few of the stones by washing them with mild soap. They should be shiny and polished looking. Rinse them off and run them in one last soap cycle to clean off any film the polish may have left. Then marvel at your beautifully polished rocks!
    Dish Soap
    finished polished rocks including jasper, quartz, amethyst, tiger's eye, obsidian, and blue goldstone
Keyword Agate, Crystal, Geology, Polishing, Rock Polishing, Rock Tumbler, Rocks, Stones
Picture of Daniela Kretchmer

Daniela Kretchmer

Daniela is a lifelong crafter who loves to share her passion for crafting. Through classes or learning on her own, she likes to say she'll do pretty much any craft aside from scrapbooking. Her current personal obsessions include garden crafts, felting, and spinning yarn.

More Craft Projects and Ideas

7 thoughts on “Rock Tumbling 101: Beginner’s Guide to Polishing Rocks”

  1. 5 stars
    Most detailed and informative rock tumbling info I have found on the net. Please edit as you learn more tricks. Here’s a trick I used that served me well….When out in the field rockhounding, bring a plastic bottle with about 1/4 water and one drop dish soap. (I use the Plastic beverage container with the big opening) When you find a rock of interest, toss it in the bottle. At the end of the day, after swishing around in the bottle…and rolling around on my truck’s floor on the ride home…The rocks are very clean after removing the water. Makes identification much easier…and an easy way to conserve water. Many rocks look different after rolling around in dish soap water…sometimes good…sometimes not.

  2. As a complete beginner (aside from watching a few “Michigan Rocks” videos) I found your guide educational, useful, and interesting. Being a written document makes it es[ecially useful (vs a video) as it can be readily referenced to find specific information as it is needed. I’m sure there are much more advanced books available, but as an introduction, I think this is just right… not too wordy, not too nerdy, just right to get one going!

    The only suggestion I might make would be to add the names of at least some of the stones pictured. That would be a great help to us beginners.

Leave a Comment

Your email address will not be published. Required fields are marked *

Rating