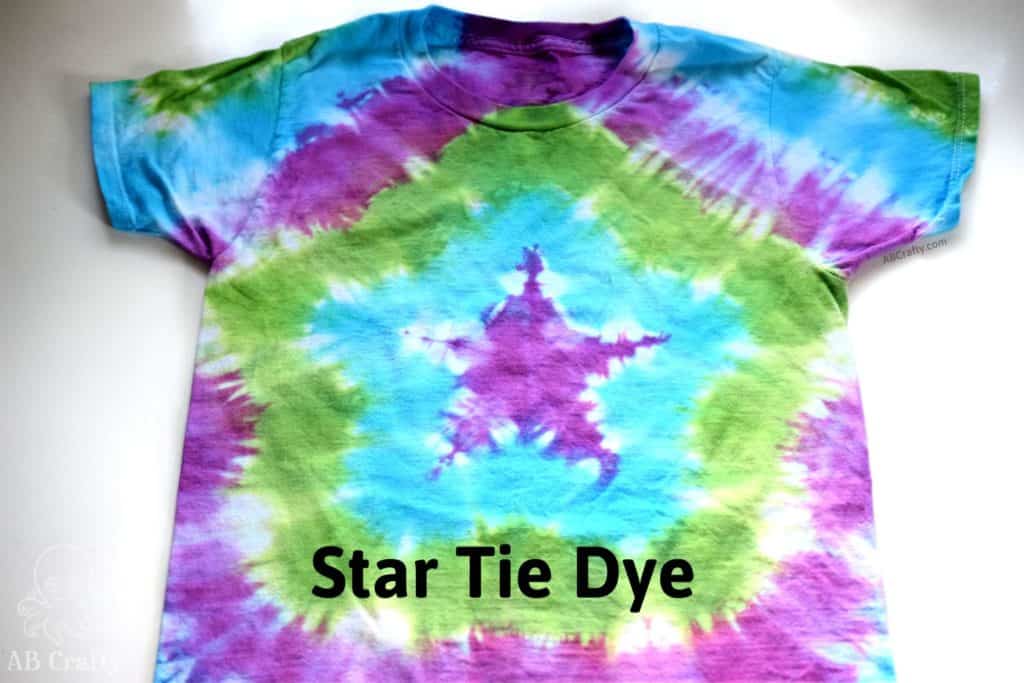
Make a star tie dye design. In just a few easy steps you’ll be able to make this fun and festive star tie dye pattern. It’s the perfect personalized 4th of July shirt design or to wear any day!
Table of Contents
Making tie dye shirts is such a fun way to celebrate different holidays (like I did with my Halloween shirts and heart tie dye shirt for Valentine’s Day). Now with the 4th of July coming up, it’s time for a star design!
I made mine in fun colors to wear year-round, but you can make it in traditional red, white, and blue or even pastel colors. You also don’t have to make a shirt, you can also make a sweatshirt, shorts, or even socks!
I also made a template to make it super easy to make this tie dye design.
Note: Some links in this post may contain affiliate links, which means at no cost to you, I may earn a commission.
Be sure to pin it to save it for later!
Materials to Make the Star Tie Dye Shirt
- White Cotton Shirt (such as these)
- Washable Markers (this is the set I like)
- Zip Ties or Rubber bands (these are the ones I have)
- Tie Dye Kit (Amazon) – I always recommend using kits with soda ash, but you can also use the one step kits (Amazon). Be sure to get a kit that includes black tie dye – all of the ones I’ve linked to here do!
- Rubber Gloves
- Plastic Wrap
- Paper Towels
- Star Tie Dye Template
Free Downloadable Star Tie Dye Template
Download this template to make it easy to make this star tie dye shirt. Download it below or in the shop.
Scale it to the size you want and print it out to make it super easy to draw the design.
Download the Free
Star Tie Dye Template
We’re committed to your privacy. AB Crafty uses the information you provide to contact you about relevant content and products. You may unsubscribe from these communications at any time.
Instructions to Make a Star Tie Dye Design
Before anything, be sure to wash your shirt so that it removes any chemicals or anything that will prevent the dye from soaking in.
Draw the Star Tie Dye Design
As with all of my tie dye designs, if you just washed it, leave it wet, otherwise get it wet. Then start by folding the tank top or shirt in half. This way you will have perfectly symmetrical design when you unfold it.
Draw half of a star along the fold using a washable marker (I recommend getting this set with multiple colors).
I always have trouble free-hand drawing a star so I made it easy with the free downloadable template. Simply cut out the template and trace around it.
Fold the Shirt for the Tie Dye Star Design
The key to this tie dye design is the way you cold the shirt. Start by placing one finger in the center of the star, along the fold.
Line up the point of the star at the top of the fold with the next tip of the star. You should be able to see through the shirt to make sure it’s lined up.
Fold the shirt back on itself along this line.
Fold the shirt again from the center, lining up the star tips again.
Then fold the shirt back on itself again along this line.
Make sure all of the marker lines are on top of each other and the shirt is evenly folded.
Tie the Shirt to Secure the Star Design
Accordion fold the shirt on the line – be sure to keep the line of the fold straight. Then secure it with a zip tie or rubber band (these are the ones I have)
Another option is to sew along the design and pull the thread to scrunch it, like how I did with my pumpkin tie dye shirt.
For the rest of the shirt, you have two options. The first is to simply use the scrunch tie dye method and randomly crumple the shirt and tie it.
The second is to have the star design continue to the rest of the shirt. To do this, fold the rest of the shirt according to how it naturally wants to be folded. Then attach additional zip ties or rubber bands along the rest of the shirt.
Soak the Shirt
Next you want to soak the shirt in a water and soda ash mixture for at least 20 minutes.
Follow the instructions on your kit, but it’s typically 1 cup of soda ash for 1 gallon of water. Make sure all of the soda ash is dissolved.
Then when you’re ready to dye the shirt, squeeze out the excess.
Prepare the Dye
Prepare the dye according to the instructions on your tie dye kit. Typically you fill the bottles with warm water up to a line and then shake them until the dye powder is dissolved.
For my star tie dye shirt, I wanted to make it in bright colors – blue, green, and purple. You can mix your own colors and put them in an extra bottle if your kit comes with them or a cup (my go-to is yogurt containers). Purple can be challenging to mix, but I have a whole post on how to make purple.
You can test the colors by putting a drop on a paper towel and seeing how it looks.
Dye the Star Tie Dye Shirt
When you’re happy with the color, put on some gloves and cover the area with plastic wrap.
Then use the squeeze bottle, eye dropper, or spoon to add the first color to the first section. This is the main star that will be in the middle. I chose purple for this one.
Be sure to flip it over and add dye to the other side. You can also push the dye into the shirt to make sure it’s fully saturated.
Continue to add dye to each section between the zip ties. I made mine with alternating colors.
Tip: Use a paper towel to wipe up the dye from the plastic wrap between colors. Otherwise the dye may go to sections you don’t want.
Wrap it all up in plastic wrap and let it set for at least 6 hours, but I recommend a full 24 hours.
Rinse and Enjoy!
After the time is up, rinse it in the sync with cool and then warmer water. Remove the ties and continue rinsing until the water runs clear.
Then throw it in the washing machine with other tie dye clothes. Run it through the dryer and your star tie dye shirt is ready to wear!
See all of my tie dye patterns for more inspiration.
If you make your own star tie dye shirt, I’d love to see it! Tag me on Instagram @ab.crafty
Get the latest DIY tutorials, reviews, and crafting updates
You'll never be spammed and can unsubscribe at any time
More Tie Dye Projects
Get the latest DIY tutorials, reviews, and crafting updates
You'll never be spammed and can unsubscribe at any time
Star Tie Dye Design
Materials
- 1 White Cotton Shirt
- Washable Marker
- Rubber Bands or Zip Ties
- 1 Tie Dye Kit or Tie-Dye Dye and Soda Ash
- Water
- 1 pair Rubber Gloves
- Plastic Wrap
- Paper Towels
Equipment
- 1 Bucket or Plastic Bin
Instructions
Draw the Star Tie Dye Design
- Get the shirt wet. Then fold it in half and draw half of a star with a washable marker. Use the printable star template to make it easy to draw the star.1 White Cotton Shirt, Washable Marker, Water
Fold the Shirt
- Place a finger in the center of the star, along the fold. Line up the point of the star at the top of the fold with the next tip of the star. You should be able to see through the shirt to make sure it’s lined up.
- Fold the shirt back on itself along this line.
- Fold the shirt again from the center, lining up the star tips again.
- Then fold the shirt back on itself again along this line.Make sure all of the marker lines are on top of each other and the shirt is evenly folded.
- Accordion fold the shirt on the line – be sure to keep the line of the fold straight. Then secure it with a zip tie or rubber band (these are the ones I have)Rubber Bands or Zip Ties
- Fold the rest of the shirt according to how it naturally wants to be folded. Then attach additional zip ties or rubber bands along the rest of the shirt.
Soak the Shirt in Soda Ash
- Soak it in a solution of soda ash and water. You want to mix 1 cup of soda ash with 1 gallon of water until it’s all dissolved.1 Tie Dye Kit or Tie-Dye Dye and Soda Ash
Dye The Shirt
- Mix the dyes according to the instructions on the tie dye kit. Cover your area with plastic wrap, put on gloves, and add dye to the first section - this will be the middle star.1 Tie Dye Kit or Tie-Dye Dye and Soda Ash, Plastic Wrap, 1 pair Rubber Gloves
- Continue to add dye to each section, wiping up excess dye with a paper towel so the colors don't mix accidentally. Make sure it's fully saturated.Paper Towels
- Wrap it in the plastic and let it set for at least 6 hours, but I recommend giving it a full 24 hours.
Wash the Shirt
- Rinse it in the sink until the water runs clear. Then wash it in the washing machine with other tie dye clothes. Run it through the dryer and your tie dye star shirt is ready to wear!