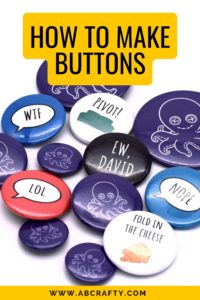
How to Make Professional Buttons
I have shared my professional process for making custom buttons in my craft studio. This guide covers how to use my free templates, avoid common jams, and choose the right paper weight for a perfect result every time.
Materials
- 1 Button Maker
- Button Template
- Circle Cutter or Punch
- 20lb Printer Paper
- Button Base and Backing and Plastic Cover that comes with the Button Make
Equipment
- 1 Scissors or Circle Cutter
Instructions
Make the Button Design
- Use my free template to create your design. Ensure your main design stays within the 'safe zone' and print on 20lb basic printer paper for the best results. I've also included a link to the digital template within Canva.Button Template

- Cut out your designs using a circle punch or rotary cutter (such as this one). A precise, clean edge is necessary for the machine to tuck the paper under the metal shell properly.Circle Cutter or Punch, 20lb Printer Paper

Press the Buttons
- Place the metal shell, your design, and one layer of Mylar into Side 1 of the machine. I always check to make sure I haven't grabbed two pieces of Mylar by mistakeButton Base and Backing and Plastic Cover that comes with the Button Make, 1 Button Maker

- Rotate the machine and pull the lever down firmly to crimp the shell, paper, and Mylar together. The pieces will stay in the top die of the machine.

- Place the pin backing into Side 2, ensuring it is aligned with the top of your design. Rotate the machine base and pull the lever again to finish your button.

Notes
Download the button template here for free to make your own button designs.
Note: If the lever feels stuck, don't force it. This is usually caused by paper that is too thick or a double layer of Mylar. I suggest using a tiny bit of silicone lubricant on the sliding parts of your machine once every few months to keep everything moving smoothly.