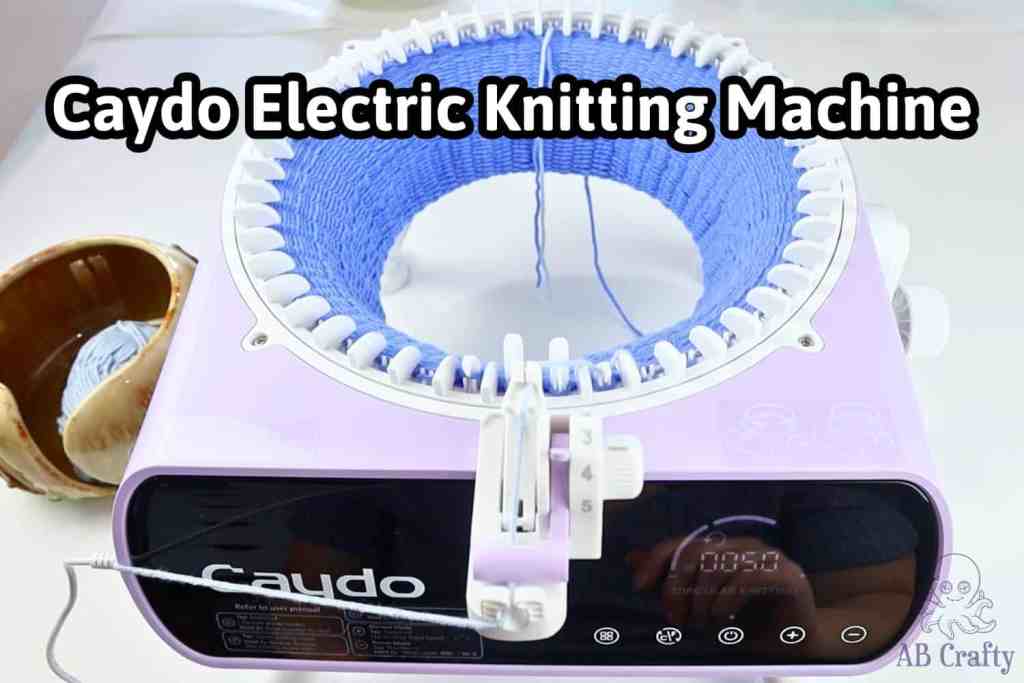
If you’ve ever ended a long machine knitting session with a sore arm from cranking your Sentro for hours, this might be the exact upgrade you haven’t known you needed. Today I’m testing out Caydo’s brand new electric knitting machine. I’ll go over assembly, controls, yarn compatibility, and test out both circular and flat panel modes to see if this is actually a game changer.
If you’re ready to grab one, you can click here to buy the Caydo Electric Knitting Machine. Make sure to use the launch code KNIT12 for 12% off, or you can try my standard code for Caydo, ABCRAFTY, which normally gets you 15% off!
Table of Contents
Note: Some links in this post may contain affiliate links, which means at no cost to you, I may earn a commission.
Get the latest DIY tutorials, reviews, and crafting updates
You'll never be spammed and can unsubscribe at any time
Don’t forget to pin it so you can easily come back to it later!

Unboxing: What Comes with the Machine?
When you unbox it, you’ll see it comes with a great set of supplies to get you started immediately:
- Table clamps
- Edge weights
- A screwdriver
- Extra needles
- Gear grease
- A crochet hook
- Tapestry needles
- Starter yarn
The machine comes in two different colors. Mine came in purple, but it also comes in blue if you prefer that look. The power cord is a standard AC wall adapter with a cable that’s nearly 5 feet long, which gives you good reach near a desk.
Exclusive Reader Discount: Planning to grab one? Use the limited-time launch code KNIT12 at checkout to get 12% off your Caydo machine. If that code has expired, try my standard coupon code for Caydo, ABCRAFTY for a discount!
How to Assemble the Caydo Electric Knitting Machine
Before you turn it on, here is how to set it up step by step:
- Flip the machine upside down. Make sure the lifted needles hang over the edge of your table so you don’t accidentally snap them while working.
- Attach the legs. Screw in the legs using the included screwdriver and screws.
- Clamp it down. Slide on the two table clamps to secure it to your workspace. It doesn’t come with suction cups, so your craft table must have an exposed lip or an edge to clamp onto.
- Attach the hand crank. Yes, this is an electric machine, but having the manual hand crank as an option is awesome for fine-tuning stitches or doing delicate cast-offs.
- Install the tensioner. Pop on the rubber stopper for flat panels and screw in the tensioner assembly right above it.
Important Setup Tip: Protect Your Needles! When flipping the machine upside down to screw in the legs, make sure the raised needles hang over the edge of your table. If they press flat against the table surface while you press down to attach the screws, they can easily snap!


Understanding the Tensioner Anatomy
To get perfect stitches, it’s important to understand how the tensioner works.
Yarn Inlet: Located right at the top, this is where your yarn feeds into the assembly.
Tension Dial Knob: Adjusts your yarn’s tension. The numbers go from 1 to 5, going from loose to tight. The higher the number, the tighter your tension will be.
Tension Compensator: This piece in the middle moves up and down to keep your yarn feeding smoothly as the needles pull.
Yarn Feeder: Located on the back, this guides the yarn directly into the machine.
Note: Here’s a weird quirk I found while testing. Even though the knob has the numbers printed 1 through 5, I was able to click it past the number 5 three more times. Because it isn’t clear what tension you are actually on after those extra clicks, I just ignored them. For the worsted weight yarn I tested, I selected tension level 3.

Using the Digital Display and Row Counter
The digital interface tripped me up at first, so here is exactly how to operate it:
Power & Mode: Hold down the power button to turn it on, then press “C/F” to toggle between circular and flat panel modes.
Speed: Press the plus and minus buttons to change the speed. There are three levels, but if you click past that third level, it’ll loop right back around to level 1.
Setting a Row Limit: To set a specific row limit, press the left button with the four squares icon until the digits start flashing. Press the plus or minus buttons to select the current digit. To jump between digit places, hold down the plus button to move to the left, or hold down the minus button to move to the right. Once your number is set, let it sit for a few seconds until it stops flashing to save it.
Resetting: Long press the leftmost button (the four squares icon) to reset the counter back to 0.
The most important part: Look at the four squares icon next to your number. If that icon is visible, the machine will count down from your number to 0 and then stop automatically. If that icon isn’t showing, the machine will count up starting from whatever number is currently shown.
Quick Tip: Row Counter Display Trick
Pay close attention to the four-squares icon next to your number on the digital screen:
- Icon Visible: The machine will count down from your set number (e.g., 50 to 0) and automatically stop when finished.
- Icon Hidden: The machine will count up continuously starting from whatever number is currently displayed.

Get the latest DIY tutorials, reviews, and crafting updates
You'll never be spammed and can unsubscribe at any time
Circular Mode Test: Knitting a Reversible Beanie
To cast on the yarn, it works just like a manual machine. Start with the yarn in front of the first needle, and then behind the next, continuing that pattern all the way around. Once you reach the last needle, put the yarn through the yarn feeder, then over the tension compensator, and then under the tension bar. Lastly, pass it through the yarn inlet.
I have an easy to follow visual explanation in my Sentro knitting machine hat post. If you prefer not to use a machine at all, you can also check out my loom knitting a hat tutorial.
If your counter starts counting down before you have that first row set, don’t panic. Just pause, hold down the settings button, and reset your numbers so your row count stays accurate.

To see how the motorized circular mode performs under real working conditions, I tested it out by knitting a double-sided, two-color beanie. This machine features 48 needles, which is the perfect size for a large adult beanie. As soon as you turn it on, you’ll feel just how smooth this machine is compared to a Sentro. It moves like butter. Circular mode gives you three speed settings:
- Level 1: 10 rows per minute
- Level 2: 14 rows per minute
- Level 3: 18 rows per minute
The machine is so fast that catching a dropped stitch mid-row is tough. Keep a close eye on your yarn feed, because if it gets caught, the tension will change and cause dropped stitches. If a mistake happens past the most recent row, I honestly prefer to just undo it all and start over since the machine knits so quickly.

Flat Panel Mode: Hands-Free Panels
When knitting a flat panel, the speed is locked at 1 for safety and precision. You can make full-length panels across 42 needles or set shorter panels of whatever size you want.
To get started, set the mode button to “F” and check your direction. The machine needs 4 needles of space to bounce and switch directions. If you want to make a full-width panel, you only need to insert one stopper on the far side because needle number 1 acts as the built-in stopper for the opposite side. If you are making a smaller panel, you’ll use two stoppers.
Cast on manually using your edge weights, hold your yarn taut into the tensioner for the first few stitches, and don’t forget to move the weights up as the panel grows. The included weights do stretch out the stitches of that very first row, so it’ll take some practice to get those edges perfect. Honestly, the automatic stoppers take all of the guesswork out of back and forth panel knitting.

Get the latest DIY tutorials, reviews, and crafting updates
You'll never be spammed and can unsubscribe at any time
What Yarn is Best for a Knitting Machine?
Stick to standard plied yarns up to worsted weight. I tested a low twist cotton yarn on the flat panel, and because the plies separate easily, it snags on the needles like crazy. It’s frankly terrible for a knitting machine, so stick to smooth, tightly plied worsted yarns for the best results. If you love experimenting with how patterns handle different yarns, you might also find my latest AI crochet test interesting!

Final Verdict: Is the Caydo Electric Knitting Machine Worth It?
To wrap up the downsides, the lack of suction cups means you are limited to clampable tables. The tension dial clicks past its own numbers, and at top speed, it’s loud enough that you won’t be watching TV without turning the volume way up.
On the flip side, moving at up to 18 rows a minute with zero arm fatigue makes cranking out projects faster than ever. It’s night and day compared to a Sentro. Yes, it’s a luxury item since a Sentro with a drill attachment is much cheaper, but this is hands-free, meaning you don’t have to hold a drill, and you have automated flat panel creation. Because of this, getting an Addi no longer makes sense since this machine is only slightly more. It’s as smooth and durable, but it’s electric, counts down and stops automatically, and can do flat panels. I truly believe this is the best option in the higher price point.
If you want to see exactly how this model compares to others on the market, read my full guide to the best knitting machines.
To grab one of these for yourself, check out the Caydo M1 Pro Electric Knitting Machine here. Use the limited-time launch code KNIT12 to get 12% off, or try my standard code for Caydo, ABCRAFTY, which normally gets you 15% off!

Pros & Cons
| Pros | Cons |
|---|---|
|
Fully motorized with zero arm fatigue |
Loud when running at top speed |
|
Automatic direction switching for flat panels |
Requires a table with an exposed lip for clamping |
|
Three speeds, up to 18 rows per minute |
Yarn tension needs constant monitoring at high speeds |
|
Includes an optional manual hand crank |
Tension dial clicks past its highest setting |
|
Priced similarly to an Addi King, but with many more features |
Significantly more expensive than basic manual options like a Sentro |
|
Programmable row counter automatically stops when complete |
Requires being near a wall power outlet |
Frequently Asked Questions (FAQ)
How many needles does the Caydo electric knitting machine have?
It has 48 needles, which is the standard large size for circular knitting machines. If you’re making a beanie, it will make a large adult beanie.
Is the Caydo electric knitting machine loud?
Yes, it’s definitely on the louder side. At full speed, it sounds similar to a sewing machine, so you’ll likely need to turn up the volume on your TV if you are watching a show while knitting.
Can I still use the machine manually if I want to?
Absolutely! It comes with a hand crank that you can easily attach, which is perfect for delicate cast-offs or fine-tuning your stitches.
Does the machine have suction cups to stick to my desk?
No, this model doesn’t use suction cups. Instead, it comes with table clamps, so you must use it on a table or desk that has an exposed lip to clamp onto.
What happens if I drop a stitch while the motor is running?
Because it moves so fast, catching a dropped stitch mid-row is tough. If you spot it immediately, you can fix it. Otherwise, it’s honestly faster to just unravel and start over since the machine knits the rows so quickly.
More Crafts to Try
Get the latest DIY tutorials, reviews, and crafting updates
You'll never be spammed and can unsubscribe at any time

Daniela
Daniela is a lifelong crafter who loves to share her passion for crafting. Through classes or learning on her own, she likes to say she'll do pretty much any craft aside from scrapbooking. Her current personal obsessions include garden crafts, felting, and spinning yarn.