Tie Dye Shirts – How-To and Patterns

finished tie dye shirt with a rainbow target tie dye pattern with the title "tie dye shirts"

Learn everything you need to know about making tie dye shirts. Learn different tie dye shirt patterns so you can impress family and friends with your custom tie dye shirts!

Table of Contents

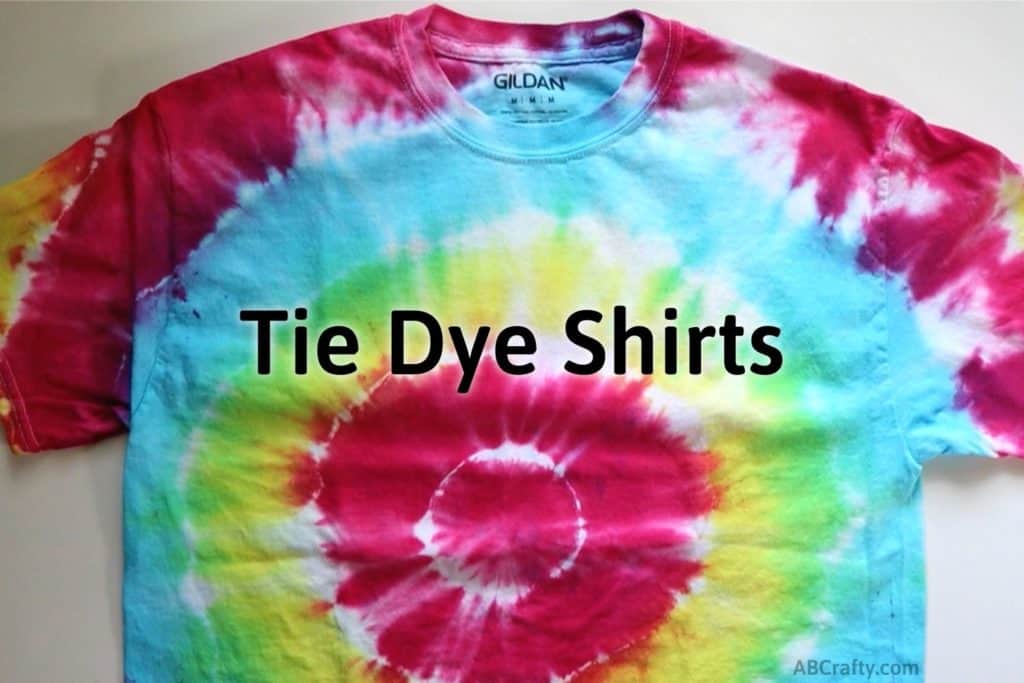
If you want to get started with tie dye, chances are you’ll want to make some tie dye shirts. They’ve become the go-to when it comes to tie dyeing. I mean, let’s be honest, when you think of tie dye, you’re probably picturing a tie dye shirt.

Tie dye shirts are a fantastic craft project for both kids and adults. Kits are readily available or you can start collecting your own dyes. The best part is there’s really no way to “mess up” and there are tons of tie dye shirt patterns and designs you can make. I use an easy crumple tie dye method to show you the step by step process, but I’ve also included how to make an easy rainbow bullseye tie dye pattern.

You can also make a tie dye sweatshirttie dye socks, tie dye shorts, and even tie dye Crocs or tie dye shoes to match. And here’s how to make a tie dye crop top.

Be sure to check out this guide on the best tie dye kits.

Note: Some links in this post may contain affiliate links, which means at no cost to you, I may earn a commission.

What's the Best Type of Shirt to Tie-Dye?

The material is the most important thing when it comes to making tie dye shirts. Ideally you want 100% cotton, but definitely at least 60%. Less than that and your colors won’t be as vibrant, but the pastel tie dye look is also something you might be going for.

Tip: Polyester is the enemy of tie dye. Traditional tie dye kits that you’ll find can’t be used on polyester so try to avoid it if you can.

You can also tie dye colored shirts, but the lighter the better. And keep in mind that the dye colors may not show up as expected on a colored shirt.

When getting shirts to dye, I like to get them in large packs since dye kits will dye multiple shirts.

Be sure to pin it so you can come back to it later!

top image is a rainbow target tie dye shirt with the bottom photo of a scrunch tie dye shirt and the title "tie dye shirts how-to and patterns"

Materials to Tie Dye Shirts

Basic Instructions for How to Tie Dye Shirts

Prepare the Shirt for Dye

It’s best to first wash your shirt prior to even starting. This removes any chemicals, oils, or anything else that may prevent your shirt from accepting the dye. This is a do as I say, not as I do kind of thing as I am way too impatient to wash things before dyeing!

Once washed, you can either take it directly out of the washing machine. Or if you already washed it or are too lazy like me, soak your shirt in water.

Getting the shirt wet makes it easier to shape and tie. 

soaking a plain white t shirt in a plastic bin with water

Squeeze out the water and scrunch, fold, and/or twist the shirt however you would like.

In this example I used the classic and easy crumple method. There’s really no wrong way to do it!

scrunching a white t shirt

Once you shape your shirt, wrap it with rubber bands, string, or zip ties.

You simply want to make sure it’s secure. But whatever you use will also affect how your tie dye shirts look. They act as “resists” because where they are placed resists the dye.

holding a plain white t shirt scrunched and wrapped in rubber bands

Prepare the Soda Ash Mixture and Shirts for Tie Dye

If you’re using a one-step tie dye kit, you don’t need to do this part so you can skip ahead to the next step. That being said, I still do recommend doing this step since the colors can be more vibrant.

However, if your kit has soda ash, now is the time to mix it with water until it’s completely dissolved. Mix 1 cup of soda ash for each gallon of water.

pouring soda ash into a clear plastic tub of water

Then soak your tied up shirt in the soda ash mixture for at least 20 minutes.

Tip: It’s a good idea to squish the shirt and flip it over to make sure it gets all throughout.

(You’ll see I was soaking the shirt along with a sweatshirt and socks that I would also tie dye)

multiple pieces of white clothing wrapped in rubber bands and soaking in water and soda ash in a plastic bin

Prepare the Dye

You can follow the instructions in your kit, but typically you add warm water to the dye bottles. These bottles have powdered dye in them so you just need to fill them to the indicated line and shake them up!

Tip: When shaking them, hold a paper towel over the top as I have yet to find a single dye bottle that doesn’t leak at least a little bit.

Tip #2: Wear gloves when mixing the dye!

pouring water into a bottle of yellow dye next to bottles of red and blue dye
holding bottles of red, yellow, and blue tie dye

Dye the Shirt

Once your dyes are ready, remove your shirt from the soda ash mixture (if you used it). Then place it onto some plastic wrap.

Put on some gloves (your kit will likely come with some, but I like to use my own since I have tiny hands).

Start with the lightest color and apply the dye where you want it. Be sure to flip it over and get the opposite side as well.

squeezing yellow dye onto a scrunched and tied white t shirt

Then move on to the next color.

Tip: When adding dye, be sure to get between the folds. This way you have enough dye.

squeezing red dye onto a scrunched and tied white t shirt with spots of yellow dye

Tip #2: Squish the dye into the shirt to help spread it. This also helps colors mix together and blend.

squishing red dye into a scrunched up t shirt with yellow dye on it

Tip #3: Wipe up the plastic between colors so you don’t get colors where you don’t want them.

using a paper towel to wipe dye off of plastic wrap on a table while holding a partially tie dyed shirt

Finish off with your darkest color – in this case it was blue.

squeezing blue dye from a bottle onto the folds of a partially tie dyed shirt

Once you’ve added dye how you like it, lift up the plastic wrap off the table and use it to wrap your shirt.

wrapping a just tie dyed shirt in plastic wrap

Leave it to set wrapped up for at least 6 hours. And even though I say 6, I actually recommend leaving it for at least 24 hours to get the most vibrant colors.

While it’s setting, make sure it doesn’t dry out. The moisture from being wrapped in the plastic helps the dye process.

holding a tie dyed shirt wrapped in plastic wrap

Once the time is up, rinse the tie dye shirt.

I like to use cool water first to get out the main dye while it’s still wrapped up.

rinsing a rainbow tie dye shirt under water with the dye dripping out

Then increase the water temperature and remove the rubber bands. If you don’t want to save the rubber bands, you can cut them off with scissors to make it easier.

Keep rinsing until the water runs clear.

rinsing a tie dye shirt under the faucet

Then throw it in the washing machine with all of your other tie dye shirts. You want to wash it first without your normal clothes, just in case there’s still some extra dye left.

Lastly, toss it in the dryer and your tie dye shirt is ready to wear!

You can even add a design or words on top of it using the sublimation technique!

Get the latest DIY tutorials, reviews, and crafting updates

You'll never be spammed and can unsubscribe at any time

finished scrunch tie dye shirt with rainbow colors

More Tie Dye Shirt Patterns and Designs

You can make any type of pattern on your tie dye shirts, but here are a few of my favorite tie dye shirt patterns. You can also see my full collection of tie dye designs and patterns that includes all clothing types.

Click on the names or images to jump to the instructions for each pattern.

Rainbow Bullseye Tie Dye Shirt Pattern

Pinch the middle of the shirt and lift up, gathering the rest of the shirt.

pinching and lifting the center of a white t shirt on a table
holding a t shirt by the center and pulled

Wrap a rubber bands around the shirt about and inch or two apart.

Each rubber band will be a white ring in the final tie dye shirt so the more rubber bands you have, the more white and rings your shirt will have.

white shirt wrapped a few inches apart in rubber bands

Add red to every third section. And yes, I broke the “lightest color first” rule, but I wanted to start at the top of the rainbow.

I didn’t plan ahead for mine so I had one extra section that I also dyed red.

squeezing red dye onto different sections of a wrapped t shirt

Then add yellow to the section to the right of the red. Then blue next to yellow.

squishing blue dye onto the end of a tie dye shirt wrapped in rubber bands

Wrap it up in the plastic wrap and roll it to help blend the colors.

rolling a rainbow tie dye shirt wrapped in rubber bands

And voila! You have tie dye rainbow bullseye shirt!

finished tie dye shirt with a rainbow target tie dye pattern

Corner Bullseye Tie Dye Shirt Pattern

This tie dye shirt pattern is similar to the rainbow bullseye. However, instead of pinching the shirt in the middle, pinch it in the corner.

You also can make a tie dye shirt in a single color or multiple shades of the same color, like in this all blue tie dye shirt.

finished corner bullseye shibori tie dye shirt in shades of blue and indigo

Striped Tie Dye Shirt Pattern

Accordion fold the shirt. Then add rubber bands every 1-2 inches, evenly spaced apart.

Alternate the colors of dye to get different colored stripes.

striped shibori tie dye shirt in indigo and grey

Circle Burst Tie Dye Shirt Pattern

I absolutely love this unique tie dye shirt pattern! To make it, start by folding the shirt in an accordion fold.

Next, pinch and lift the top corner and add a rubber band. Then move a few inches down across the top and repeat. Continue across the top. Then repeat along the bottom edge, but place the rubber bands between the rubber bands on the top.

You can use the guide below as an example.

diagram for a target burst tie dye pattern
finished shibori tie dye shirt with small bursts of circles

Pumpkin Tie Dye Shirt

Click here to see the full step by step instructions to make this pumpkin shirt.

But the short version, is you want to fold the shirt in half and draw half of a pumpkin using washable markers.

half of a pumpkin drawn on a folded white shirt as the template for a tie dye pumpkin

Sew a running stitch along the lines. Pull the threads and tie them off.

Crumple the rest of the shirt and tie to secure it.

sewing the lines of the middle of a pumpkin on a folded shirt for a tie dye pumpkin design

Add orange dye to the pumpkin section and green dye to the stem. Then the rest is black.

squeezing black dye onto the side of a scrunched shirt

And you’ll get a beautiful pumpkin tie dye shirt, perfect for fall and Halloween!

finished tie dye pumpkin shirt with a pumpkin in the middle and black tie dye edges

Bat Tie Dye Shirt

Click here to see the full instructions to make a bat tie dye shirt design.

But similar to the pumpkin shirt, fold the shirt in half and draw a bat design.

white cotton shirt folded in half with half of a bat drawn on it with blue washable marker

Then sew along the design and pull on the threads to create the small folds.

pulling on the threads to scrunch and fold the shirt along the bat design

Cover it completely in black dye.

squeezing black tie dye out of a bottle onto the tied up shirt

Then you have your tie dye bat shirt!

finished black tie dye bat shirt

Ice Tie Dye Shirt

Click here to see the full instructions to ice tie dye.

To ice dye, you want to crumple the shirt and elevate it in a dish or pan. Then cover it with ice.

Ice cubes covering a shirt on top of yogurt containers in a glass 9x13 pan

Instead of preparing the dye like normal, leave it in the powder form and sprinkle the dye over the ice.

Sprinkling blue powdered dye over ice on top of a shirt with yellow and red powdered dye on it

As the ice melts, it creates this beautiful watercolor and marble effect.

finished blue, purple, and pink ice tie dye shirt

Star Tie Dye Shirt

Click here to see the full instructions to make this fun star tie dye design.

Similar to the other shape designs, fold the shirt in half and draw half of a star with a washable marker. You can use the free downloadable star template to make it easy.

tracing around a star template with a washable marker on a folded white shirt

Then you’re going to fold the star from the centre of the fold so that the top corner lines up with the center of the next corner.

folding a white shirt with half of a red star design
white shirt folded over with part of a red star design showing

Fold it back on itself so that you’re not rolling the shirt up, but instead making accordion folds. Then line up the points again, continuing until the shirt is folded and all of the marker lines line up.

folding the corner of a white shirt
white shirt folded over with red marker drawn on it

Fold along this line and secure it with a zip tie or rubber band. Then add more zip ties to the rest of the shirt.

wrapping a zip tie around the corner of a folded white shirt
white shirt folded and tied with zip ties

The first section will be the main center star so start with that section and add dye. Then add dye to the rest of the sections in whichever order you would like.

completely dyed shirt wrapped in zip ties with sections of blue, green, and purple

Then you’ll have your star tie dye shirt!

finished shirt with a star tie dye design in purple, blue, and green

Dyeing Colored Shirts

Yes, you can dye already dyed shirts!

If it’s light colored, you can simply add dye on top and treat it like a white shirt.

If the shirt is dark, then you want to use the bleach tie dye method. Instead of adding dye, you use a bleach solution to remove dye from the shirt. This leaves a fun color underneath (typically a shade of orange or red) and you get a fun reverse tie dye effect.

3 bleach tie dye t shirts and 1 bleach tie dye tank top

How to Wash Tie Dye Shirts

After dyeing, rinse the tie dye shirts in warm water until they run clear. Then simply toss them in the washing machine with other tie dye clothing. This way if they still have some dye, it won’t stain your other clothes.

Once they’re washed once, they’re completely fine to wash with your regular clothing.

More Tie Dye Projects

Get the latest DIY tutorials, reviews, and crafting updates

You'll never be spammed and can unsubscribe at any time

top image is a rainbow target tie dye shirt with the bottom photo of a scrunch tie dye shirt and the title "tie dye shirts how-to and patterns"

Tie Dye Shirts

Learn everything you need to know about making tie dye shirts.
Yield 1 Tie Dye Shirt
Project Time 20 minutes
Setting Time 1 day
Total Time 1 day 20 minutes

Materials
  

  • White Cotton Shirt
  • Tie Dye Kit or Tie-Dye Dye and Soda Ash
  • Water
  • Rubber Bands
  • Plastic Wrap
  • Rubber Gloves
  • Paper Towels

Equipment

  • Bucket or Plastic Bin

Instructions
 

Prepare the Shirt for Dye

  • Soak the shirt in water.
    White Cotton Shirt, Water
    soaking a plain white t shirt in a plastic bin with water
  • Squeeze out the water and scrunch, fold, and/or twist the shirt however you would like.
    scrunching a white t shirt
  • Wrap it with rubber bands, string, or zip ties.
    Rubber Bands
    holding a plain white t shirt scrunched and wrapped in rubber bands

Prepare the Soda Ash Mixture and Shirts for Tie Dye

  • If you’re using a one-step tie dye kit, you don’t need to do this part so you can skip ahead to the next step.
    Mix 1 cup of soda ash for each gallon of water until completely dissolved.
    Tie Dye Kit or Tie-Dye Dye and Soda Ash
    pouring soda ash into a clear plastic tub of water
  • Soak your tied up shirt in the soda ash mixture for at least 20 minutes.
    multiple pieces of white clothing wrapped in rubber bands and soaking in water and soda ash in a plastic bin

Prepare the Dye

  • Fill the dye bottles to the line with warm water.
    pouring water into a bottle of yellow dye next to bottles of red and blue dye
  • Shake until the dye is dissolved.
    holding a bottle of red dye showing the dye powder at the bottom of the bottle
  • Repeat the process for all of the colors of tie dye.
    holding bottles of red, yellow, and blue tie dye

Dye the Shirt

  • Put on plastic gloves and apply the lightest color of dye where you want it. Be sure to flip it over and get the opposite side as well.
    Rubber Gloves
    squeezing yellow dye onto a scrunched and tied white t shirt
  • Add the next color of dye. Separate the folds to get the dye everywhere.
    Wipe up the dye with paper towels between colors.
    Paper Towels
    squeezing red dye onto a scrunched and tied white t shirt with spots of yellow dye
  • Squish the dye into the shirt to help spread it. This also helps colors mix together and blend.
    squishing red dye into a scrunched up t shirt with yellow dye on it
  • Finish it by adding the darkest color.
    squeezing blue dye from a bottle onto the folds of a partially tie dyed shirt
  • Once you’ve added dye how you like it, lift up the plastic wrap off the table and use it to wrap your shirt.
    wrapping a just tie dyed shirt in plastic wrap
  • Let it set for at least 6 hours, but ideally 24 hours.
    holding a tie dyed shirt wrapped in plastic wrap
  • Rinse the tie dye shirt until the water runs clear. Start with cool water and increase the temperature.
    Remove the rubber bands.
    rinsing a rainbow tie dye shirt under water with the dye dripping out
  • Throw it in the washing machine with all of your other tie dye shirts. Then dry and they're ready to wear!
    finished scrunch tie dye shirt with rainbow colors
Keyword Clothing, Dyeing Fabric, Rainbow Tie Dye, Shirt, Tie Dye, Tie Dye Kit
Daniela Kretchmer

Daniela Kretchmer

Daniela is a lifelong crafter who loves to share her passion for crafting. Through classes or learning on her own, she likes to say she'll do pretty much any craft aside from scrapbooking. Her current personal obsessions include garden crafts, felting, and spinning yarn.

More Craft Projects and Ideas

Leave a Comment

Your email address will not be published. Required fields are marked *

Rating