How to Tie Dye Shorts: Easy Offset Spiral Tutorial

bright pink american apparel shorts with white trim dyed in a spiral design with black dye and the title says "tie dye shorts"

Make your own tie dye shorts at home. With just one color of dye or multiple, you’ll be able to make these fun custom shorts!

With all the other tie dye items I have, I wanted to make a pair of tie dye shorts to see how they’d turn out. Since they’re shorts, there’s not much room to create a clear design, but I wanted to see how a spiral might look on them.

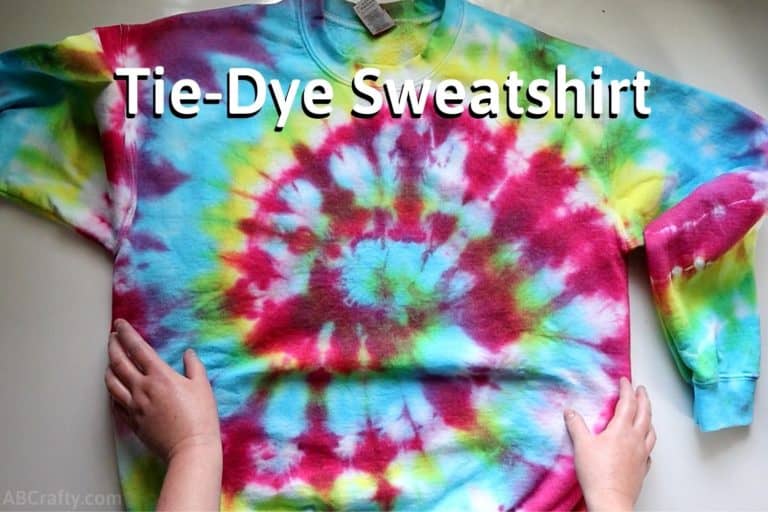
If you don’t know already, I rarely ever wear the tie dye clothing I make (aside from the tie dye sweatshirt and tie dye Crocs), but I loved how these turned out! The contrast of the black dye on the pink shorts looks so cool, and I love that the trim stayed white. I ended up finding some cute American Apparel looking shorts in pink with white trim on Amazon that’d be perfect.

You can follow the steps below to make your own tie dye shorts with a spiral design! I also include the basic steps to tie dye shorts if you don’t want to do a spiral. You could even use the ice tie dye technique or any other tie dye pattern!

For all things tie dye, you can use my code ABCRAFTY for 20% off at Jacquard.

Be sure to also check out this guide on the best tie dye kits to find the right one.

Table of Contents

Note: Some links in this post may contain affiliate links, which means at no cost to you, I may earn a commission.

Get the latest DIY tutorials, reviews, and crafting updates

You'll never be spammed and can unsubscribe at any time

Don’t forget to pin it so you can easily come back to it later!

top image is bright pink american apparel shorts with white trim dyed in a spiral design with black dye and the bottom image is adding dye to the shorts wrapped in rubber bands, the title says "step by step tutorial -tie dye shorts, abcrafty.com"

Which Shorts are Best to Tie Dye?

The best material for dyeing would be 100% cotton, but that can often be rare to find for shorts. Therefore look for shorts that have at least 50% cotton. This is because polyester and other synthetic materials don’t absorb the dye from tie dye kits very well.

Most trim, piping, and thread used on clothing are 100% polyester, which is why the white stripes and trim on my shorts remained bright white.

For color, if you want to have black tie dye shorts like mine, any color will work! But if you want the dye to stand out, pick a lighter color. Keep in mind, unless the shorts are white, the colors of the dye will likely look different on the colored fabric. Another option you can go with for colored shorts is using the bleach tie dye method in which you don’t use any dye at all!

To make it easy, look for athletic or lounge shorts with a high percentage of cotton, such as retro runner shorts or fleece sweatshorts.

Pattern Placement Tips for Tie Dye Shorts

The biggest challenge and the genuinely unique part to dyeing shorts or pants is paying attention to how the pattern is going to turn out.

When making a tie dye shirt, it’s difficult to make the design look silly. But with shorts, you want to look out for putting a centered design directly in the middle on the front or the back.

For these tie dye shorts, I went with an offset spiral design. The reason I made it offset is so the center of the spiral didn’t look as though it was emanating out of me. By pinching near the top corner instead of the middle, you get a beautiful diagonal spiral flow across the fabric.

(Or, you could go the complete opposite route and deliberately fold a heart design!)

Materials to Make Tie Dye Shorts

How to Tie Dye Shorts (Step-by-Step)

Step 1: Wash and Fold the Shorts

I always recommend first washing clothes before tie dyeing them. This removes any chemicals, oils, or anything else that may prevent your shirt from accepting the dye.

1. Take the damp shorts out of the wash (or wet them and squeeze out excess water).

2. Lay them flat on your surface.

3. For the offset spiral tie dye design, pinch the top corner of the shorts, making sure you’re grabbing both the front and back fabric.

pinching the top corner of bright pink american apparel shorts with white trim

4. Continue to twist the shorts into a tight spiral. Tip: Use your other hand to guide clean folds as you twist.

Tip: Use your other hand to make nice clean folds while you wrap it around.

twisting the top corner of pink shorts with white seams

5. Place 3 rubber bands evenly across the twisted bundle to create 6 pie sections.

pink shorts completely twisted into a disc and wrapped in rubber bands

Step 2: Soak in Soda Ash Solution

If your kit doesn’t come with soda ash, I highly recommend buying it separately (use code ABCRAFTY for 20% off at Jacquard). Using soda ash ensures your colors pop, which is especially important when dyeing colored fabric!

1. Mix 1 cup of soda ash into 1 gallon of warm water in a bucket until completely dissolved.

pouring soda ash into a clear plastic tub of water

2. Place your tied shorts into the solution and let them soak for at least 20 minutes. 

3. Tip: Squish the shorts and flip them over halfway through so the mixture goes into all the inner folds.

white shirt and pink shirt tied up and and soaking in a bowl of water and soda ash

Get the latest DIY tutorials, reviews, and crafting updates

You'll never be spammed and can unsubscribe at any time

Step 3: Mix the Dye

1. Put on your rubber gloves.

2. Prepare the dye according to your kit instructions.

3. Typically, you fill the bottle halfway with warm water, shake until the powder is fully dissolved, then fill the rest of the bottle to the line and shake again. This minimizes clumps and spills. (I recommend this kit with black or this one which has comes with the bottles. You can also get them for 20% off with code ABCRAFTY)

Step 4: Apply Dye to the Shorts

1. Lay down plastic wrap on your table and place the bound shorts on top.

2. If you’re doing an offset spiral with one color (like black), apply dye to one section. Press the bottle tip into the folds so the dye saturates deep inside.

pouring black dye from a squirt bottle onto pink shorts tied with rubber bands

3. Skip the next section and dye the following one. Repeat so there are 3 dyed sections and 3 undyed sections.

4. Flip the shorts over and repeat the exact same section pattern on the back.

5. If you’re using multiple colors, apply your lightest color first and continue filling in sections as desired.

Tip: Use enough dye so the fabric is fully saturated, but not dripping wet. When using black dye, make sure you apply plenty of dye so it doesn’t wash out looking gray. See my black tie dye post to see more tips on how to use black dye.

adding black tie dye to pink shorts wrapped in rubber bands in 3 different sections

Step 5: Set, Rinse, and Wash

1. Wipe up any excess dye off the plastic wrap with a paper towel.

2. Wrap the shorts tightly in the plastic wrap. 

3. Let them set for at least 6 hours (24 hours is recommended for the most vibrant results).

covering the pink shorts freshly dyed with black dye in plastic wrap

4. After setting, keep your gloves on and rinse the shorts under cool water first. Gradually increase the temperature to warm water until the water runs completely clear. 

5. Run the shorts through a washing machine cycle with other tie dye clothes just in case of extra color bleeding.

6. Toss them in the dryer, and your tie dye shorts are ready to wear!

Get the latest DIY tutorials, reviews, and crafting updates

You'll never be spammed and can unsubscribe at any time

finished pink shorts with black tie dye in the shape of a spiral from the top corner

If you dye your own shorts, I’d love to see them! Tag me on Instagram @ab.crafty!

Frequently Asked Questions About Tie Dye Shorts

Can you tie dye sweatshorts?

Yes! You can tie dye sweatshorts as long as they have high cotton content. Look for lounge or sweatshorts made of 100% cotton or at least 50% cotton. Avoid 100% synthetic athletic materials such as nylon or polyester, as standard tie dye kits won’t work with them.

Why did the white trim or stitching stay white?

Most commercial clothing is sewn using 100% polyester thread, and many decorative trims are also synthetic. Fiber-reactive tie dyes only bond with natural cellulose fibers like cotton, rayon, or linen. The synthetic thread repels the dye, leaving crisp white stitching or piping.

How do I keep black dye from looking gray?

Black tie dye requires more dye powder concentration and longer setting times than lighter colors. Make sure to thoroughly saturate inside every fold, use a soda ash soak prior to dyeing, and let the garment batch in plastic wrap for a full 24 hours before rinsing.

More Tie Dye Projects to Try

Get the latest DIY tutorials, reviews, and crafting updates

You'll never be spammed and can unsubscribe at any time

top image is bright pink american apparel shorts with white trim dyed in a spiral design with black dye and the bottom image is adding dye to the shorts wrapped in rubber bands, the title says "step by step tutorial -tie dye shorts, abcrafty.com"

Offset Spiral Tie Dye Shorts

Learn how to tie dye shorts at home using an offset spiral technique to get perfect pattern placement!
Yield 1 Pair of Tie Dye Shorts
5 from 1 vote
Project Time 20 minutes
Setting Time 1 day
Total Time 1 day 20 minutes

Materials
  

  • 1 Pair Cotton Shorts
  • Tie Dye Kit (or single black dye)
  • 1 Cup Soda Ash
  • 1 Gallon Water
  • Rubber Bands
  • Plastic Wrap
  • Rubber Gloves
  • Paper Towels

Equipment

  • 1 Bucket or Plastic Bin

Instructions
 

Prepare the Soda Ash Mixture and Shorts for Dye

  • Wash shorts and leave damp. Pinch the top corner of the shorts, twist into a tight spiral, and secure with 3 rubber bands to make 6 sections.
    Rubber Bands
    pink shorts completely twisted into a disc and wrapped in rubber bands
  • Soak the shorts in soda ash solution for at least 20 minutes. Mix 1 cup soda ash with 1 gallon of warm water.
    1 Cup Soda Ash, 1 Gallon Water
    white shirt and pink shirt tied up and and soaking in a bowl of water and soda ash

Prepare the Dye

  • Prepare the dye according to the instructions on the tie dye kit. Typically you fill the bottle to the line with warm water and then shake it until the dye dissolves.
    Tie Dye Kit (or single black dye), Rubber Gloves

Dye the Shorts

  • Lay down plastic wrap on the table and place the shorts on top. Add the dye into one section.
    Plastic Wrap
    pouring black dye from a squirt bottle onto pink shorts tied with rubber bands
  • Skip the next section and dye the next. Repeat so there are alternating sections of dye and no dye.
    adding black tie dye to pink shorts wrapped in rubber bands in 3 different sections

Finish the Tie Dye Shorts

  • Clean the plastic wrap with a paper towel and wrap the shorts. Leave to set for 24 hours.
    Paper Towels
    covering the pink shorts freshly dyed with black dye in plastic wrap
  • Rinse them until the water runs clear. Then run them through the washing machine. Then your tie dye shorts are ready to wear!
    finished pink shorts with black tie dye in the shape of a spiral from the top corner

Notes

I used only black to dye these shorts, but you can also use multiple colors. I recommend getting a kit that has colors and black, such as this one.
Keyword Clothing, Shorts, Spiral, Tie Dye, Tie Dye Kit
Picture of Daniela Kretchmer

Daniela Kretchmer

Daniela is a lifelong crafter who loves to share her passion for crafting. Through classes or learning on her own, she likes to say she'll do pretty much any craft aside from scrapbooking. Her current personal obsessions include garden crafts, felting, and spinning yarn.

More Craft Projects and Ideas

2 thoughts on “How to Tie Dye Shorts: Easy Offset Spiral Tutorial”

Leave a Comment

Your email address will not be published. Required fields are marked *

Rating