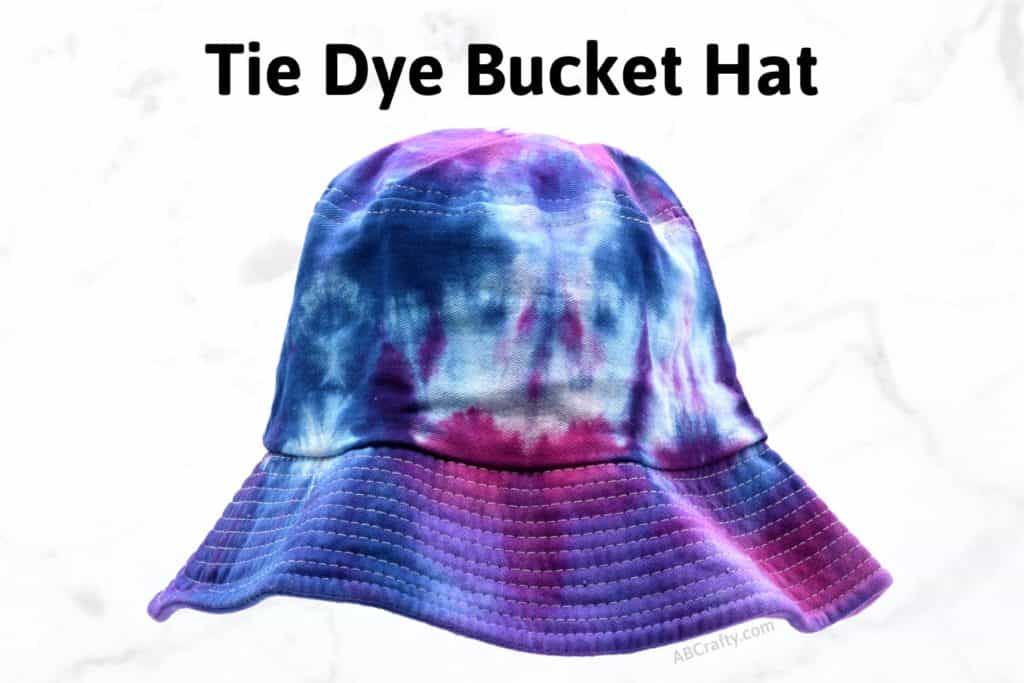
Tie Dye Bucket Hat

blue, purple, and pink dyed bucket hat with the title "tie dye bucket hat"

Customize a tie dye bucket hat, perfect for summer! In just a few steps you’ll have your own tie dye bucket hats.

Table of Contents

Note: Some links in this post may contain affiliate links, which means at no cost to you, I may earn a commission.

It’s safe to say I’ve been obsessed with tie dye for a while. And while I’ve dyed clothing, shoes, and Crocs, I haven’t yet shared how I’ve dyed hats. So this is all about how you can easily make adorable tie dye bucket hats! 

Hats can be a little more challenging to dye since the brims are hard and you may think you won’t be able to dye them, but you can! With this simple technique, you’ll get a beautiful almost water color effect, while still having the classic pops of white. And while I use this technique, you can also use others including the ice tie dye technique or using pastel colors. Or if you have a colored hat, you can bleach tie dye it.

Be sure to also check out this guide on the best tie dye kits to find the right one.

Get the latest DIY tutorials, reviews, and crafting updates

You'll never be spammed and can unsubscribe at any time

Which Bucket Hats are Best to Tie Dye?

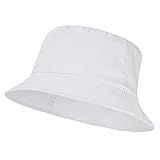
You want to get one that is white and 100% cotton, but finding a bucket hat that is truly 100% cotton can be incredibly tricky to find. There are a lot advertised as cotton, but in reality they’re synthetic. It actually took me a while, but I was able to find this one on Amazon.

The reason you need 100% cotton is because polyester and other synthetic materials don’t absorb the dye from tie dye kits very well. I actually originally bought some bucket hats that said they were cotton, but learned they were synthetic while dyeing because they didn’t absorb the dye.

Then the white material helps the colors show up the best. However, you’re welcome to get a colored one, but know that the colors you dye it will come out slightly different. That being said, another option is to dye the hat with the bleach tie dye method in which you don’t use any dye at all!

The two hats below are 100% cotton so you can choose the style you like the best for your tie dye bucket hats.

Don’t forget to pin it so you can easily come back to it later!

blue, purple, and pink tie dye bucket hat with the title "tie-dye bucket hat" - how to easily tie dye bucket hats

Materials to Make a Tie Dye Bucket Hat

How to Make a Tie Dye Bucket Hat

For this tie dye bucket hat, I went with a super easy technique since the brim is challenging to work with. Because the brim is so thick, it’s very difficult to tie it up. Therefore you’re either left with dyeing the whole brim or if you do tie it, very little dye will get onto it.

That being said, if you want more of a challenge, here are all of my tie dye patterns.

Prepare the Tie Dye Bucket Hat

I always recommend first washing items before tie dyeing them. This removes any chemicals, oils, or anything else that may prevent your hat from accepting the dye.

So if you wash it first, then you can simply take them out of the wash. Otherwise, first wet the hat and squeeze out the excess water.

putting a white cotton hat into a bowl of water

The easy way to tie dye a bucket hat is to twist the top of it, allowing the rest of it to twist as much as possible.

twisting the top of a white cotton bucket hat

Then secure it with zip ties. I recommend using these since they’re reusable.

Put the last zip tie as close to the brim as possible.

white hat twisted at the top and tied with black zip ties

Prepare the Soda Ash Mixture for the Tie Dye Bucket Hat

If you’re using a kit without soda ash, you can skip this step, though I don’t recommend it. I always recommend using soda ash when tie dyeing to get the most vibrant color. You can get an extra bag here.

You’ll want to mix 1 cup of soda ash to 1 gallon of warm water. Mix it until the soda ash is completely dissolved.

Get the latest DIY tutorials, reviews, and crafting updates

You'll never be spammed and can unsubscribe at any time

pouring soda ash into a clear plastic tub of water

Then soak the hat in the soda ash mixture for at least 20 minutes.

Tip: It’s a good idea to squish the hat and flip it over to make sure the mixture really soaks into it.

I like to do my tie dye projects at the same time so I’ll soak a bunch of items at once. In this case I also soaked it with some sweatpants, shirts, a zip hoodie, and a crop top.

white cotton clothing twisted and tied with zip ties and rubber bands and soaking in a bucket of soda ash solution

Prepare the Dye

Put on your gloves (I recommend getting your own pair like these since the ones with the kit tend to be huge and terrible).

Prepare the dye according to the instructions on the tie dye kit. Typically you fill the bottle to the line with warm water and then shake it until the dye dissolves.

Tip: I recommend filling the bottle only a little bit and dissolving the dye in that. Then fill the bottle the rest of the way. This helps minimize any spills and leakage.

Tip #2: Did you know you can mix tie dye colors? You can! This is what I did since I wanted different colors than the dye came with. I made purple and mixed a different pink and blue into some recycled yogurt containers.

Dye the Bucket Hat

Lay down plastic wrap on the table and place the hat on top.

If you’re using dye from the bottle, start with one color and place it wherever you’d like. If you mixed your own, use a spoon to pour the dye onto the hat.

Leave plenty of white space to allow for other colors.

Tip: Press the dye into the hat to make sure it’s fully saturated.

adding blue dye to a twisted and tied bucket hat

Continue to add different colors randomly around the hat.

For the brim, be sure to add color on the inside and spread the folds of the brim. Otherwise, the brim will be left with large white spots.

Tip: Start with the lighter colors first (the opposite of what I did here) – so you’ll do pinks, yellows, oranges, and reds first.

Tip #2: Use a paper towel to wipe up as you change colors so you don’t get color where you don’t want it! 

adding pink dye to a cotton hat that has blue dye on it

Make sure the bucket hat is fully dyed. You want it saturated, but not dripping.

(You can see the inside of the brim is also fully dyed).

completely dyed bucket hat with blue, purple, and pink dye

Finish the Tie Dye Bucket Hat

Wipe up any excess dye with a paper towel. Then wrap it tightly in the plastic wrap.

Leave it to set wrapped up for at least 6 hours. However, I recommend leaving it for at least 24 hours to get the most vibrant colors.

While it’s setting, make sure it doesn’t dry out. The moisture from being wrapped in the plastic helps the dye process.

wrapping the tie dyed bucket hat with plastic wrap

After the time is up, rinse it until the water runs clear.

I like to use cooler water first and then increase the temperature as the hotter water will cause the color to leave more quickly. Tip: Wear gloves while rinsing since there will still be some dye that comes out.

Then run it through the washing machine with other tie dye items just in case there’s an extra color bleeding.

Lastly, toss it in the dryer and your tie dye bucket hat is ready to wear!

Get the latest DIY tutorials, reviews, and crafting updates

You'll never be spammed and can unsubscribe at any time

If you make your own tie dye bucket hats, I’d love to see them! Tag me on Instagram @ab.crafty!

finished blue, purple, and pink tie dye bucket hat

And here’s what the back of that hat looks like.

other side of the tie dyed bucket hat

And lastly, here’s the top of the tie dye bucket hat. I just love the watercolor effect the random color patterns give! Such beachy vibes, making them great paired with some water shoes for the beach.

top of the finished purple blue and pink tie dye bucket hat

More Tie Dye Projects to Try

And be sure to find the right tie dye kit for your projects with this guide of the best tie dye kits.

Get the latest DIY tutorials, reviews, and crafting updates

You'll never be spammed and can unsubscribe at any time

blue, purple, and pink dyed bucket hat with the title "tie dye bucket hat"

Tie Dye Bucket Hat

Customize a tie dye bucket hat, perfect for summer! In just a few steps you’ll have your own tie dye bucket hats.
Yield 1 Tie Dye Bucket Hat
Project Time 20 minutes
Setting Time 1 day
Total Time 1 day 20 minutes

Materials
  

  • 1 100% White Cotton Bucket Hat
  • 1 Tie Dye Kit
  • 1 Cup Soda Ash
  • 1 Gallon Water
  • Zip Ties
  • Rubber Gloves
  • Mixing Containers optional
  • Plastic Spoons optional
  • Plastic Wrap
  • Paper Towels

Equipment

  • 1 Bucket or Plastic Bin

Instructions
 

Prepare the Bucket Hat for Dye

  • Soak the hat in water and squeeze out the excess. Twist the top. (This is the one I used)
    1 100% White Cotton Bucket Hat
    twisting the top of a white cotton bucket hat
  • Secure it with zip ties
    Zip Ties
    white hat twisted at the top and tied with black zip ties

Prepare the Soda Ash Mixture and Hat for Dye

  • Soak the hat in soda ash solution for at least 20 minutes. Mix 1 cup soda ash with 1 gallon of warm water. You can get some on Amazon.
    1 Cup Soda Ash, 1 Gallon Water
    white cotton clothing twisted and tied with zip ties and rubber bands and soaking in a bucket of soda ash solution

Prepare the Dye for the Tie Dye Bucket Hat

  • Put on the gloves and prepare the dye according to the instructions on the tie dye kit. Typically you fill the bottle to the line with warm water and then shake it until the dye dissolves.
    You can also mix your own colors in separate containers.
    1 Tie Dye Kit, Mixing Containers, Plastic Spoons, Rubber Gloves

Dye the Bucket Hat

  • Lay down plastic wrap on the table and place the hat on top. Add the dye one color at a time, pushing the dye into the hat.
    Wipe up the area with a paper towel between colors.
    Plastic Wrap, Paper Towels
    adding pink dye to a cotton hat that has blue dye on it
  • Continue adding dye until it's all covered. Be sure to get the inside of the brim.
    completely dyed bucket hat with blue, purple, and pink dye

Finish the Tie Dye Bucket Hat

  • Wrap it in plastic wrap and let it set for 24 hours.
    wrapping the tie dyed bucket hat with plastic wrap
  • Rinse it until the water runs clear. Then run it through the washing machine. Then your tie dye bucket hat is ready to wear!
    finished blue, purple, and pink tie dye bucket hat
Keyword Accessory, Hat, Tie Dye, Tie Dye Kit
Picture of Daniela Kretchmer

Daniela Kretchmer

Daniela is a lifelong crafter who loves to share her passion for crafting. Through classes or learning on her own, she likes to say she'll do pretty much any craft aside from scrapbooking. Her current personal obsessions include garden crafts, felting, and spinning yarn.

More Craft Projects and Ideas

Leave a Comment

Your email address will not be published. Required fields are marked *

Rating